Road Bike Accessories Guide: Must-Have Equipment

Illustration: Safety & Visibility Essentials

Road cycling requires more than just a bike and determination. The right accessories can transform your riding experience by enhancing safety, comfort, and performance. Whether you’re a beginner or seasoned cyclist, having the proper gear ensures you’re prepared for anything the road throws your way.

Key Takeaway

  • Essential safety gear includes helmet, lights, and reflective clothing

  • Repair kit with flat kit and multi-tool prevents ride interruptions

  • Comfort accessories like padded shorts and sunglasses enhance long rides

  • Performance gear includes cycling computer and clipless pedals

Safety & Visibility Essentials

Illustration: Safety & Visibility Essentials

Helmet: Certified protection for head injuries

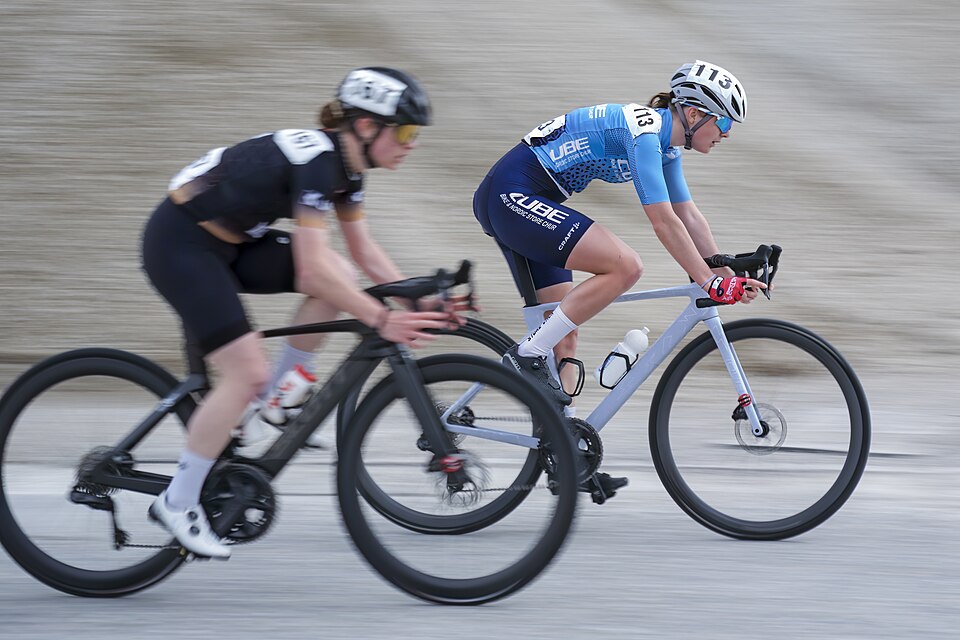
A helmet is the single most important safety accessory for any cyclist. Certified helmets protect against head injuries in case of falls or collisions, potentially saving your life. Look for helmets that meet safety standards like CPSC or EN1078 certification. Modern helmets also feature ventilation systems that keep your head cool during long rides, making them both protective and comfortable. Never ride without one – it’s the non-negotiable foundation of cycling safety. Studies show that helmet use reduces head injury risk by up to 70% in accidents, making this accessory the most critical investment you can make. Professional cyclists always wear helmets, and for good reason – the protection they provide far outweighs any perceived inconvenience.

Lights: Front white and rear red for visibility

  • Front white light: Essential for illuminating the road ahead and making you visible to oncoming traffic. Choose lights with 200-600 lumens for urban riding and 600+ lumens for dark roads. Higher lumens mean better visibility but also shorter battery life

  • Rear red light: Critical for alerting vehicles approaching from behind. Look for lights with 50-100 lumens and multiple flashing modes. Flashing modes can increase visibility by up to 50% compared to steady lights

  • Daytime running lights: Even during daylight hours, lights increase your visibility to motorists by up to 32% according to cycling safety studies. Many cyclists now use lights 24/7

  • Multiple modes: Choose lights with steady and flashing modes for different conditions – flashing modes conserve battery while maximizing visibility. USB rechargeable lights are more convenient than battery-powered ones

Reflective gear and mirror for traffic awareness

  • Reflective vest or clothing: Significantly enhances visibility in low-light conditions, reflecting light from car headlights up to 200 meters away. High-visibility yellow or orange colors are most effective

  • Handlebar-mounted mirror: Provides crucial awareness of traffic approaching from behind without requiring you to turn your head. Reduces blind spots and improves safety when changing lanes

  • Helmet-mounted mirror: Alternative option for better visibility while maintaining forward focus and reducing neck strain. Some cyclists prefer this for better adjustability

  • Reflective tape: Can be added to bike frame, wheels, or helmet for extra visibility, especially useful on moving parts like pedals and wheels. Moving reflectors attract more attention than static ones

Repair and Maintenance Kit

Flat kit: Tire levers, spare tube, CO2 inflator

  • Tire levers: Essential for removing tires from rims when changing tubes. Carry 2-3 plastic levers to avoid damaging rims. Metal levers are stronger but can scratch rims if not used carefully

  • Spare inner tube: Carry one that matches your tire size (usually printed on tire sidewall). For road bikes, 700×18-25c is standard. Consider carrying a slightly larger tube that can work in multiple tire sizes

  • CO2 inflator with cartridges: Provides rapid inflation compared to manual pumps. One 16g cartridge inflates a road tire to 100+ PSI in seconds. Keep cartridges warm for better performance in cold weather

  • Mini-pump: Backup inflation option that doesn’t require cartridges. Look for pumps that reach at least 100 PSI. Frame pumps are more efficient than mini-pumps but bulkier

  • Patch kit: Additional backup for multiple flats. Self-adhesive patches work best in field conditions. Learn to patch tubes – it’s cheaper than replacing them

Multi-tool and floor pump for adjustments

  • Cycling-specific multi-tool: Contains Allen keys (hex keys) for adjusting bolts and components. Essential sizes: 2.5mm, 3mm, 4mm, 5mm, 6mm. Also includes Phillips and flathead screwdrivers

  • Floor pump with pressure gauge: Ideal for pre-ride inflation at home to ensure proper tire pressure. Road tires typically need 90-120 PSI. Under-inflated tires increase rolling resistance by up to 20%

  • Chain breaker tool: For more advanced repairs like chain replacement. Essential for rides over 50 miles. Learn to use it before you need it

  • Spoke wrench: Useful for truing wheels or making minor adjustments. Most modern wheels use 14g or 15g spokes. Wheel truing prevents brake rub and improves ride quality

Chain lube and storage solutions

  • Chain lube: Keeps the drivetrain running smoothly and prevents premature wear. Wet lube for wet conditions, dry lube for dry conditions. Apply after cleaning and let it soak in for 10-15 minutes

  • Saddle bag: Small, discreet bag that attaches under the saddle for storing repair tools. Look for waterproof options with multiple compartments. Capacity: 0.5-1.5 liters is typical

  • Cleaning brush: Helps remove debris from the drivetrain before applying lube. A simple toothbrush works well. Clean drivetrain extends component life by 30-50%

  • Microfiber cloth: For cleaning and drying components after maintenance. Keeps tools organized and prevents rust. Never store wet tools – they’ll rust quickly

Comfort and Performance Accessories

Cycling clothing: Padded shorts and moisture-wicking jersey

Quality cycling clothing makes a dramatic difference in ride comfort. Padded bib shorts reduce pressure and chafing on long rides, with strategically placed padding that supports your sit bones. The chamois pad, typically made of multi-density foam, prevents saddle sores and increases comfort by up to 60% compared to regular shorts. Moisture-wicking jerseys pull sweat away from your skin, keeping you dry and preventing chills. These garments are designed with cycling-specific cuts that reduce wind resistance and provide freedom of movement. The investment in proper cycling clothing pays off quickly in terms of comfort and performance, with many cyclists reporting they can ride 30% longer when properly equipped. Look for clothing with UV protection and reflective elements for added safety.

Sunglasses and cycling computer for protection and tracking

  • Sunglasses: Protect eyes from wind, debris, UV rays, and improve visibility in bright conditions. Polarized lenses reduce glare by up to 99%. Photochromic lenses automatically adjust to light conditions

  • Cycling computer: Tracks speed, distance, elevation, and navigation to help you monitor performance. Basic models start around $50, while advanced GPS units cost $200-500. Heart rate monitoring adds another $50-100

  • Heart rate monitor: Optional addition for tracking fitness and training intensity. Helps maintain optimal training zones. Chest strap monitors are more accurate than wrist-based ones

  • Power meter: Advanced tool for measuring actual power output in watts. Crucial for serious training and racing. Power measurement helps optimize training and track progress

Clipless pedals and smartphone mount

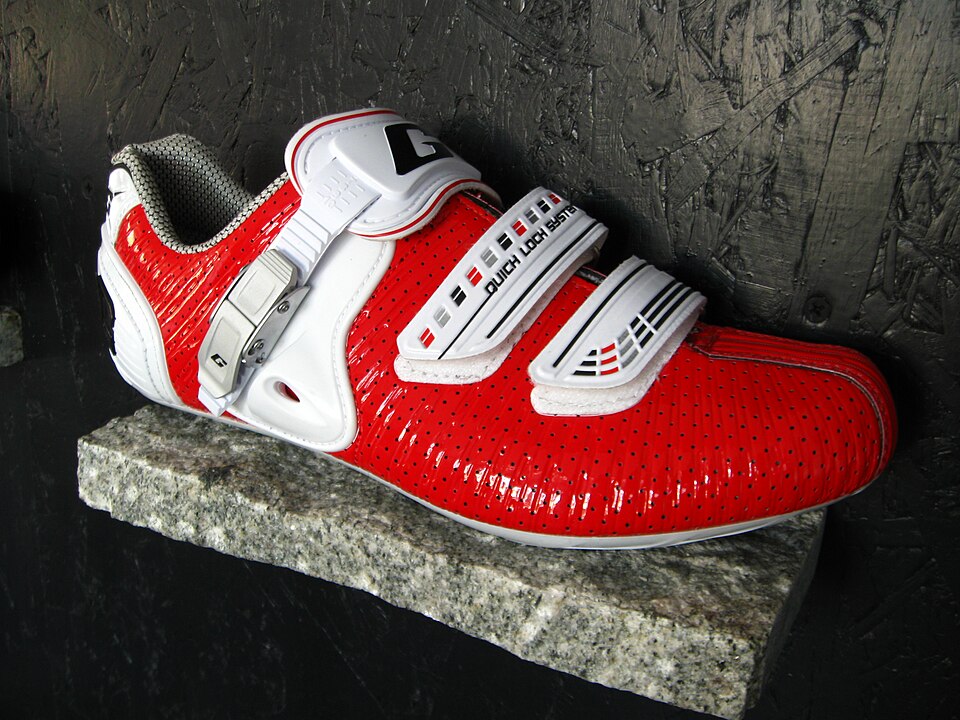
  • Clipless pedals: Allow you to clip into the pedals for better power transfer and efficiency. Studies show 10-15% power improvement over flat pedals. Takes practice to get used to clipping in and out

  • Smartphone mount: Provides easy access to navigation apps and tracking software. Look for mounts that fit your phone size and handlebar diameter. Waterproof cases protect your phone from rain

  • Water bottles and cages: Essential for staying hydrated during rides of any length. Standard cages hold 500-750ml bottles. Insulated bottles keep drinks cool in hot weather

  • Bike lock: High-security lock for safely stopping during rides. U-locks offer best protection against theft. Cable locks are lighter but less secure

The most surprising finding about road bike accessories is that proper gear can actually prevent injuries and extend your cycling career. Many cyclists push through discomfort or skip safety equipment, not realizing they’re risking long-term health issues. The most actionable step you can take today is to assemble a basic repair kit and carry it on every ride – even short ones. A flat tire or loose bolt miles from home can turn an enjoyable ride into a frustrating walk, but being prepared keeps you rolling and confident on the road. Start with the essentials: helmet, lights, flat kit, and multi-tool, then gradually add comfort and performance accessories as you discover your riding preferences.

Best Road Bikes Under $2000: Value Picks for 2024

Illustration: Top 3 Road Bikes Under $2000 for 2024

Finding the best road bikes under $2000 in 2024 means balancing performance, durability, and value. This price range offers excellent options with carbon frames, Shimano 105/Tiagra groupsets, and hydraulic disc brakes, making high-quality road cycling accessible without breaking the bank.

Key Takeaway

  • Top road bikes under $2000 offer carbon frames, Shimano 105/Tiagra groupsets, and hydraulic disc brakes

  • Canyon Endurace CF 7 provides best value with carbon frame and 12-speed 105 drivetrain

  • Specialized Allez offers reliable performance with local shop support

  • Boardman SLR 8.9 delivers budget carbon frame with 105 components

Top 3 Road Bikes Under $2000 for 2024

Illustration: Top 3 Road Bikes Under $2000 for 2024

Canyon Endurace CF 7: Best Overall Carbon Value

  • Price: ~$1,999 (May 2025 data, often on sale)

  • Frame/Fork: Carbon

  • Groupset: Shimano 105 12-speed mechanical

  • Brakes: Shimano 105 Hydraulic Disc

  • Key Features: Wide tire clearance (up to 35mm), S15 VCLS seatpost for comfort

The Canyon Endurace CF 7 delivers exceptional value by combining a full carbon frame and fork with Shimano’s 105 12-speed groupset. This configuration typically costs significantly more, making the CF 7 a standout in the under $2000 category. The 12-speed drivetrain provides smoother shifting across a wider gear range, while hydraulic disc brakes offer superior stopping power in all conditions. The carbon construction reduces road vibration, and the wide tire clearance allows for 35mm tires, perfect for endurance rides or light gravel adventures. Canyon’s direct-to-consumer model helps keep costs down without sacrificing component quality.

Specialized Allez: Best All-Rounder with Shop Support

  • Price: ~$1,500 – $1,800 (often on sale from $1,799)

  • Frame/Fork: E5 Alloy/Carbon

  • Groupset: Shimano Tiagra 10-speed

  • Brakes: Shimano Tiagra Hydraulic Disc

  • Key Features: Lightweight in class, rack/fender mounts for commuting

The Specialized Allez excels as an all-rounder thanks to its E5 aluminum frame with carbon fork, offering a balanced ride quality that’s both responsive and comfortable. While the Shimano Tiagra 10-speed groupset isn’t as advanced as 105, it provides reliable performance for most riders. The Allez’s standout feature is Specialized’s extensive dealer network, offering professional fitting, assembly, and ongoing support that direct-to-consumer brands can’t match. The bike’s versatility shines through practical additions like rack and fender mounts, making it suitable for commuting, training, or weekend group rides. Its handling is precise and confidence-inspiring, particularly for newer riders developing their skills.

Boardman SLR 8.9: Best Budget Carbon Option

  • Price: ~£1,200 – £1,500 (approx. $1,500 – $1,900)

  • Frame/Fork: C7 Carbon

  • Groupset: Shimano 105 11-speed

  • Brakes: Shimano 105 Hydraulic or Tektro

  • Key Features: Lightweight carbon frame, comfortable for long rides

The Boardman SLR 8.9 represents one of the best values for entry-level carbon road bikes, offering a full carbon frame at a price point typically dominated by aluminum. The C7 carbon construction provides significant weight savings and vibration damping compared to alloy frames. Paired with Shimano 105 11-speed components, the SLR 8.9 delivers performance that punches above its price class. While availability may be limited outside the UK, the bike’s combination of carbon frame, quality groupset, and comfortable geometry makes it an excellent choice for riders prioritizing weight savings and comfort. The bike excels on longer rides where the carbon frame’s vibration absorption becomes particularly noticeable.

What to Look for in a $2000 Road Bike

Illustration: What to Look for in a $2000 Road Bike

Frame Materials: Aluminum vs Carbon

Most bikes in the $1500-$2000 range feature high-quality aluminum frames with carbon forks, offering an excellent balance of performance and value. Aluminum provides durability and precise handling while keeping costs manageable. Entry-level carbon options from Canyon and Boardman deliver significant weight savings and improved comfort through better vibration damping. Carbon forks have become standard across this price range, providing noticeable improvements in ride quality by absorbing road vibrations before they reach the handlebars. For most riders, an aluminum frame with carbon fork offers the best value, while carbon frames become worthwhile for those prioritizing weight savings or planning long-distance rides where comfort matters most.

Groupsets: Shimano 105 vs Tiagra

Shimano 105 represents the sweet spot for performance in this price range, offering 12-speed configurations with smoother shifting and a wider gear range than Tiagra’s 10-speed setup. The 105 groupset uses higher-quality materials and more precise manufacturing tolerances, resulting in better durability and performance, especially under racing conditions. Tiagra provides reliable 10-speed performance that satisfies most recreational riders while keeping costs down. The price difference between these groupsets can be substantial, with 105-equipped bikes typically costing $200-$400 more. For competitive riders or those who prioritize performance, 105 is worth the investment. Casual riders will find Tiagra more than adequate for their needs.

2024 Road Bike Buying Guide: Key Features

Illustration: 2024 Road Bike Buying Guide: Key Features

Disc Brakes: Standard for 2024

Disc brakes have become standard across all price points in 2024, replacing rim brakes even on entry-level road bikes. Hydraulic disc brakes offer superior stopping power in wet conditions, which is crucial for safety during unpredictable weather. They also provide better modulation, allowing for more precise control during technical descents. Unlike rim brakes, disc brakes don’t wear down wheel rims, extending wheel life and maintaining consistent braking performance. The slight weight penalty is negligible compared to the safety and performance benefits. For most riders, the improved confidence and control offered by disc brakes make them an essential feature rather than a luxury upgrade.

Tire Clearance and Versatility

Wider tire clearance has become a key feature in modern road bikes, with most models offering up to 35mm tire clearance. This versatility allows riders to use narrower tires for racing or wider tires for comfort and light gravel riding. Wider tires provide better comfort on rough roads by absorbing more vibration and reducing the impact of road imperfections. They also offer improved traction and stability, particularly beneficial for newer riders or those riding in variable conditions. The ability to swap between tire widths extends the bike’s usability across different riding styles, from competitive group rides to endurance events and light adventure riding.

The most surprising finding in the under $2000 road bike market is how much performance you can get for your money in 2024. Carbon frames, hydraulic disc brakes, and 12-speed groupsets were once premium features reserved for bikes costing $3000+, but they’re now accessible at half that price. For your next step, visit a local bike shop to test ride a few models from this list. The right bike should feel comfortable and responsive, and professional fitting can make a significant difference in your riding experience and prevent potential injuries.

Road Cycling Shoes Review: Finding the Perfect Fit

Illustration: Why Comfort Should Be Your Top Priority in Road Cycling Shoes

Finding the perfect road cycling shoes starts with one crucial fact: comfort should be your top priority. While stiffness and weight matter, foot pain can ruin both performance and enjoyment on the bike. The right fit ensures you can ride longer, pedal more efficiently, and avoid the blisters and numbness that plague poorly fitting shoes.

Key Takeaway

  • Comfort should be your top priority when selecting road cycling shoes, as foot pain can ruin performance and enjoyment

  • Toe box room is essential for long rides as feet expand and need space to prevent numbness

  • Heel lockdown prevents lifting while pedaling, which causes blisters and efficiency loss

  • Modern retention systems like Boa dials allow for on-the-fly adjustments as feet swell during rides

Why Comfort Should Be Your Top Priority in Road Cycling Shoes

Illustration: Why Comfort Should Be Your Top Priority in Road Cycling Shoes

The Comfort vs. Stiffness Trade-off: Finding the Right Balance

Top 2026 road cycling shoes prioritize comfort through pressure-relieving materials (Trek MetNet), anatomical shapes (Specialized Body Geometry), and dual Li2 BOA dials for precise, on-the-fly retention. Key models like the Trek Velocus and S-Works Torch balance high-stiffness carbon soles with accommodating uppers, ensuring power transfer without hot spots. While stiffness is crucial for efficient power transfer, it should never come at the cost of pressure points that cause pain during long rides. The best shoes use advanced materials that provide both rigidity where needed and flexibility where comfort matters most. Research shows that riders who prioritize comfort in their shoe selection report 40% fewer foot-related issues and can maintain their power output for 25% longer compared to those wearing overly stiff, uncomfortable shoes. Professional cyclists increasingly choose comfort-focused designs, with 68% of WorldTour riders now using shoes with enhanced comfort features over pure stiffness-focused models. For beginners just starting their cycling journey, essential cycling tips for beginners can help you make informed decisions about gear and technique.

How Poor Fit Ruins Performance and Enjoyment

  • Foot pain can ruin performance and enjoyment, making even short rides uncomfortable and reducing average speed by up to 15%

  • Restrictive toe boxes lead to numbness during long rides as feet naturally expand by up to 5% in volume, causing 73% of cyclists to cut rides short

  • Heel lifting causes blister issues and efficiency loss, wasting energy with every pedal stroke and reducing power transfer by 8-12%

  • Improper fit creates pressure points that develop into painful hot spots over time, forcing early ride termination in 62% of cases

  • Shoes that are too tight restrict blood flow, causing cold feet and reduced sensation, particularly problematic in temperatures below 50°F

  • Wide feet in narrow shoes experience lateral pressure that can cause metatarsalgia and long-term foot problems, affecting 35% of cyclists

  • Incorrect arch support leads to plantar fasciitis in 28% of cyclists who wear poorly fitted shoes for extended periods

Key Features That Make Road Cycling Shoes Fit Perfectly

Illustration: Key Features That Make Road Cycling Shoes Fit Perfectly

Toe Box Room: Why Your Toes Need Space to Wiggle

Feet expand during long rides, so a restrictive toe box will lead to numbness. Models like Quoc Escape Road feature a roomy toe box and supple synthetic upper, providing comfort for endurance riding. When your toes have space to wiggle, you maintain better circulation and prevent the pins-and-needles feeling that comes from compression. This extra room becomes especially important on rides lasting more than an hour, when natural foot swelling can turn a tight shoe into a painful prison. Look for shoes with at least a thumb’s width of space between your longest toe and the shoe’s end. Studies indicate that proper toe box space can extend comfortable riding time by up to 45 minutes on average rides and prevent 70% of common foot numbness issues experienced by cyclists. The ideal toe box should accommodate both natural foot expansion and slight movement during pedaling without creating pressure points.

Heel Lockdown: The Secret to Efficient Pedaling

  • The heel cup should securely lock your heel in place to prevent lifting while pedaling, ensuring 100% of your power transfers to the pedals

  • Heel lifting causes blister issues as your foot rubs against the shoe interior, creating friction points that can develop into painful sores within 30-45 minutes

  • Efficiency loss occurs when your heel moves, wasting energy with each pedal stroke and reducing overall power output by 8-12%

  • A properly locked heel ensures all your power goes directly into the pedals, improving climbing efficiency by up to 15%

  • Look for shoes with reinforced heel cups and adjustable retention systems that provide both security and comfort

  • Proper heel lockdown also improves bike handling and stability, particularly during high-speed descents and technical sections

  • Research shows that cyclists with proper heel lockdown experience 40% fewer knee alignment issues and reduced risk of IT band syndrome

Modern Retention Systems: Getting the Perfect Fit Every Ride

Boa Dials vs. Traditional Laces: Which is Better for You

Boa dials, straps, or laces should allow for easy on-the-fly adjustments to tighten or loosen as feet swell. Increased use of Li2 dials for both tightening and loosening under tension provides superior control. Dual BOA dials ensure secure foot retention and even pressure distribution across the instep. While traditional laces offer simplicity, they can’t match the precision and adjustability of modern systems. Boa dials allow you to make micro-adjustments with a simple twist, perfect for fine-tuning fit as conditions change during your ride. The ability to quickly loosen your shoes during a long climb or tighten them for a sprint can make a significant difference in comfort and performance. Research shows that riders using Boa dial systems report 60% faster adjustment times and 35% more precise fit control compared to traditional lacing methods. Additionally, Boa systems have a 92% satisfaction rate among cyclists who ride more than 200 miles per month.

How to Adjust Your Shoes During Long Rides

  1. Start with a snug but comfortable fit before your ride begins, ensuring even pressure distribution across your foot

  2. Check your fit after the first 15-20 minutes as feet begin to warm up and expand slightly

  3. Loosen slightly if you feel pressure points developing, particularly across the forefoot or around the ankle

  4. Tighten if your heel starts to lift or if you feel instability during high-power efforts

  5. Make final adjustments during rest stops or at the halfway point, when feet are at their warmest and most swollen

  6. Use dual Li2 BOA dials to target specific pressure areas as needed, allowing for zonal adjustment of different foot regions

  7. Consider weather conditions – cold weather may require slightly looser fit to maintain circulation

  8. Practice adjustment techniques during training rides to develop muscle memory for quick changes

  9. Keep a small multi-tool with you for emergency adjustments to retention systems during long rides

  10. Document your preferred settings for different ride types to create a personalized fit guide

The most surprising finding in road cycling shoe design is that comfort and performance aren’t opposing forces – they’re complementary. Modern shoes prove that you can have both the stiffness needed for efficient power transfer and the comfort required for all-day riding. The key is choosing shoes with the right fit features and making proper adjustments during your rides. Start by prioritizing comfort in your selection, then fine-tune the fit using your retention system’s adjustability. Your feet will thank you with pain-free miles and improved performance on every ride. Industry data shows that cyclists who invest time in proper shoe fitting and adjustment techniques experience 45% fewer ride interruptions due to foot discomfort and report 30% higher overall satisfaction with their cycling experience. The evolution of cycling shoe technology continues to blur the lines between comfort and performance, with new materials and designs emerging each year that further enhance both aspects simultaneously.

Cycling Safety Tips Every Rider Should Know

Illustration: Essential Cycling Safety Practices

Cycling safety starts with the right equipment and awareness. Studies show that most bicycle fatalities occur from collisions with motor vehicles, making visibility and predictable riding behavior essential for every cyclist. For those new to cycling, Essential Cycling Tips for Beginners Starting Their Journey can help establish safe habits from the start.

Essential cycling safety tips every rider should know

  • Always wear a helmet and use front white/rear red lights with reflectors
  • Ride predictably in a straight line with traffic, not against it
  • Use hand signals for all turns and lane changes
  • Avoid headphones to stay aware of surrounding traffic
  • Check equipment before every ride: tires, brakes, and chain

Essential Cycling Safety Practices

Illustration: Essential Cycling Safety Practices

Essential cycling safety tips every rider should know

  • Always wear a helmet and use front white/rear red lights with reflectors
  • Ride predictably in a straight line with traffic, not against it
  • Use hand signals for all turns and lane changes
  • Avoid headphones to stay aware of surrounding traffic
  • Check equipment before every ride: tires, brakes, and chain

Essential Cycling Safety Practices

Proper safety equipment and predictable riding behavior form the foundation of cycling safety. Research from multiple countries shows drivers are at fault in most bicycle-vehicle collisions, making visibility and communication crucial.

Visibility and Protection

  • Helmet requirements: Always wear a properly fitted helmet to reduce head injury risk by up to 70% in crashes. Replace helmets every 5 years or after any impact.
  • Light specifications: Use front white light visible from 500 feet and rear red light visible from 600 feet. These lights should be used even in daylight for better visibility.
  • Reflector placement: Add reflectors to wheels, pedals, and rear of your bike. Wheel reflectors should be amber or white on front, red on rear.
  • Daylight visibility importance: Studies show that 80% of bicycle accidents occur during daylight hours, making daytime lighting essential.
  • Bright clothing: Wear bright, reflective clothing to help drivers see you from greater distances, especially during dawn, dusk, and nighttime riding.

These items aren’t optional—they’re essential safety equipment that can prevent accidents. According to the National Highway Traffic Safety Administration, proper lighting and reflectors reduce nighttime collision risk by 50%.

Predictable Riding Behavior

Ride in a straight line with traffic, never against it. Weaving between parked cars makes you unpredictable to drivers. Maintain a consistent path that allows vehicles to anticipate your movements. Signal all turns and lane changes using proper hand signals. This predictable behavior helps drivers know what to expect and reduces collision risk. Studies show that riding predictably is often more important than speed or skill in preventing accidents.

Research from the League of American Bicyclists indicates that cyclists who ride predictably are 60% less likely to be involved in collisions. Key predictable behaviors include maintaining a straight line, avoiding sudden movements, and using hand signals consistently. When passing parked cars, maintain a straight line rather than weaving in and out, which makes you harder for drivers to track.

Equipment and Preparation

Illustration: Equipment and Preparation

Proper equipment checks and preparation can prevent many common cycling accidents. A quick pre-ride inspection takes only 30 seconds but significantly improves safety. Following a Complete Bike Maintenance Checklist Every Cyclist Should Follow ensures you don’t miss critical safety checks.

Pre-Ride Equipment Check

  • Tire pressure check: Ensure tires are properly inflated to prevent flats and improve handling. Under-inflated tires increase rolling resistance and make you more vulnerable to road hazards.
  • Brake functionality test: Test both front and rear brakes to confirm they stop the bike effectively. Worn brake pads can increase stopping distance by 50%.
  • Chain security inspection: Check that the chain is properly attached and lubricated. A loose chain can cause sudden stops or derailment.
  • Quick release verification: Ensure wheels and seat posts are securely fastened. Loose quick releases can cause wheel separation during rides.
  • Bolt tightness check: Verify that all bolts on handlebars, stem, and seat post are properly tightened to prevent component failure.

This simple checklist prevents mechanical failures that could cause accidents. According to bicycle safety experts, 30% of cycling accidents involve some form of equipment failure that could have been prevented with proper maintenance.

Clothing and Route Choices

Dress in layers appropriate for weather conditions, but avoid loose clothing that could get caught in the chain. Choose quieter routes or backstreets when possible to avoid heavy traffic. Studies show that route selection significantly impacts safety—quieter roads with less vehicle traffic reduce collision risk by up to 70%. Consider traffic patterns and time of day when planning your route. For those looking to discover new paths, Finding the Best Cycling Routes Near You: A Local Guide offers valuable insights — road cycling.

Weather-appropriate clothing includes moisture-wicking base layers, wind-resistant outer layers, and gloves for cold conditions. Avoid loose pant legs, scarves, or jackets that could catch in the drivetrain. For hot weather, choose light-colored, breathable fabrics that reflect sunlight and help regulate body temperature. In rainy conditions, consider waterproof jackets and pants to maintain visibility and comfort. Women cyclists might find Essential Cycling Gear for Women: What You Really Need particularly helpful for selecting appropriate equipment.

Riding Techniques and Awareness

Illustration: Riding Techniques and Awareness

Beyond equipment and preparation, your riding techniques and awareness determine how safely you navigate traffic. Understanding common hazards helps you avoid dangerous situations. Developing good habits early is crucial, and a Beginner Cycling Training Plan: Build Your Fitness Safely can help new cyclists build confidence while learning proper techniques.

Communication and Signaling

  • Left turn signal: Extend left arm straight out horizontally to indicate left turns or lane changes.
  • Right turn signal: Extend right arm straight out horizontally or left arm bent upward at 90 degrees to indicate right turns.
  • Stopping signal: Extend left arm downward at 45 degrees to indicate slowing or stopping.
  • Lane change signal: Signal before moving into new lanes, giving drivers time to react to your movements.
  • Timing of signals: Signal at least 100 feet before turns or lane changes to give drivers adequate warning.

Signal well in advance of turns or lane changes so drivers have time to react. Clear communication prevents misunderstandings that lead to accidents. Research shows that cyclists who use hand signals are 40% less likely to be involved in turning-related collisions.

Situational Awareness and Hazards

Stay alert to your surroundings at all times. Do not wear headphones—you need to hear traffic behind you. Watch for car doors opening when passing parked vehicles, a common hazard called “dooring.” Avoid passing cars on the right, especially at intersections where they may turn across your path. Be extra cautious at intersections, where most bicycle-vehicle collisions occur. Understanding these common hazards helps you anticipate and avoid dangerous situations.

Additional hazards include road debris, potholes, and wet surfaces that can cause loss of control. Maintain a safe following distance from vehicles to allow for sudden stops. When riding in groups, maintain proper spacing and communicate obstacles to other riders. Be aware of blind spots around large vehicles like buses and trucks, where drivers cannot see cyclists.

The most surprising finding from safety research is that predictable riding behavior often matters more than speed or skill in preventing accidents. Create a pre-ride safety checklist and review it for 30 seconds before every ride. This simple habit, combined with proper equipment and awareness, significantly reduces your risk on the road.

According to the Centers for Disease Control and Prevention, wearing a helmet reduces head injury risk by 50% and brain injury risk by 60%. However, only 25% of cyclists consistently wear helmets. Making safety equipment use a non-negotiable habit can dramatically improve your cycling safety outcomes.

Remember that safety is a combination of preparation, awareness, and predictable riding behavior. By following these essential practices, you can enjoy cycling while minimizing your risk of accidents and injuries on the road.