Road Bike Groupsets Guide: Complete Overview

Illustration: What is a road bike groupset and why does it matter?

Road bike groupsets determine 60-70% of your bike’s performance and can add or subtract hundreds of dollars from the price tag. Understanding these component collections is essential for making informed purchasing decisions and getting the right performance for your riding style. If you’re new to the sport, our road cycling guide covers the basics you need to know.

Road Bike Groupsets: What You Need to Know

  • Groupsets include all mechanical components except frame, wheels, and cockpit
  • Shimano, SRAM, and Campagnolo offer tiered options from entry to professional level
  • Higher tiers provide lighter weight, faster shifting, and better braking
  • Electronic shifting is now available across all price ranges
  • Mid-tier groupsets often offer the best value-to-performance ratio

What is a road bike groupset and why does it matter?

Illustration: What is a road bike groupset and why does it matter?

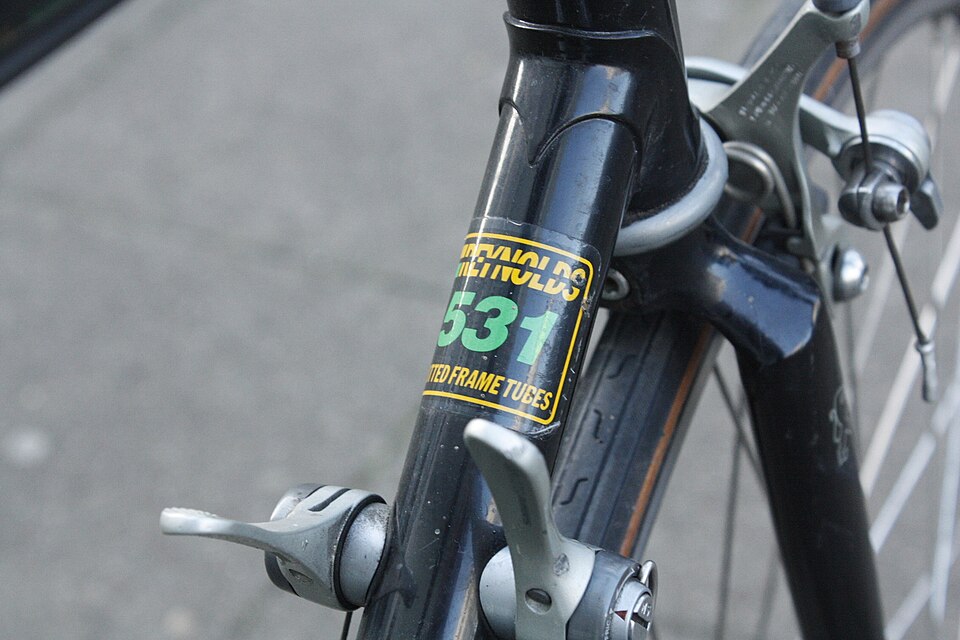
A road bike groupset is a collection of mechanical components that work together to provide shifting, braking, and power transfer on your bicycle. These components include shifters, derailleurs, cranksets, cassettes, brakes, and chains – essentially everything except the frame, wheels, and cockpit controls. The groupset you choose affects your riding experience, maintenance costs, and overall bike performance.

Groupset components and their functions

The main groupset components each serve specific functions that impact your riding experience:

  • Shifters/Brake Levers: Control gear changes and braking. Electronic shifting (Shimano Di2, SRAM AXS) offers faster, more precise shifts with customizable settings. Wireless systems (SRAM AXS) provide cleaner aesthetics and easier installation.
  • Derailleurs (Front & Rear): Move the chain between cogs and chainrings. Higher-end derailleurs are lighter and shift more rapidly and accurately under load. Electronic derailleurs maintain perfect alignment automatically.
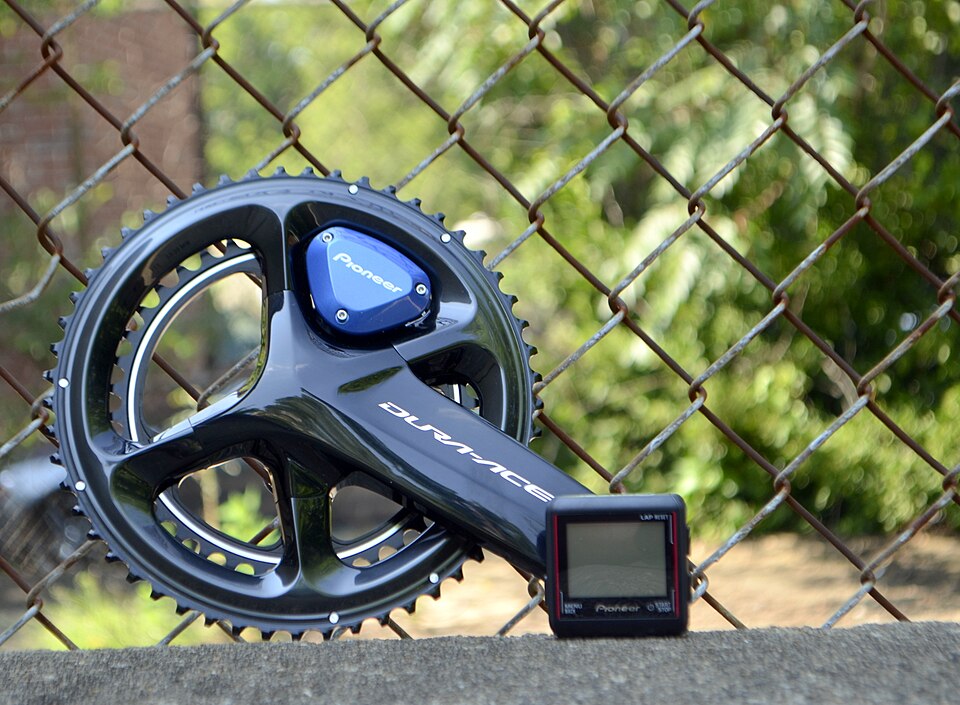
  • Crankset & Bottom Bracket: Transfer power from your pedals to the drivetrain. Materials range from aluminum to carbon fiber, affecting weight and stiffness. Crank arm lengths (170-175mm) should match your leg length for optimal power transfer.
  • Cassette/Cogset: Rear cogs that provide different gear ratios. Wider ranges (11-34T vs 11-28T) help with climbing and varied terrain. Higher-tier cassettes use lighter materials and tighter gear steps.
  • Brakes (Calipers/Disc): Essential for stopping. Disc brakes offer superior performance in various conditions compared to rim brakes. Hydraulic systems provide better modulation than mechanical options.
  • Chain: Connects the crankset to the cassette. Higher-end chains provide smoother engagement and increased durability. Some feature special coatings to reduce friction and wear.

How groupsets affect bike performance and cost

Groupset quality directly impacts your riding experience through several factors. Weight reduction is a primary benefit – higher-tier groupsets use carbon fiber and titanium instead of aluminum, saving 200-400 grams. Shifting speed and precision improve dramatically with electronic systems, allowing gear changes under heavy load that would be impossible with mechanical shifting. Durability increases with better materials and construction, extending component lifespan from 2,000 to 5,000+ miles. Price varies significantly, with entry-level groupsets costing $200-400 and professional-grade electronic systems exceeding $3,000. For detailed maintenance schedules and component care, see our Complete Bike Maintenance Checklist Every Cyclist Should Follow.

How do Shimano, SRAM, and Campagnolo groupset tiers compare?

Illustration: How do Shimano, SRAM, and Campagnolo groupset tiers compare?

Each major manufacturer offers tiered groupsets targeting different budgets and performance needs. Understanding these hierarchies helps you choose the right components for your riding style.

Shimano groupset hierarchy and characteristics

Shimano’s road groupsets range from entry-level to professional, with each tier offering specific benefits:

  • Claris: Entry-level components for casual riders and commuters. Basic shifting performance with durable construction. Features 8-speed gearing and weighs approximately 2,800 grams complete.
  • Sora: Step up from Claris with improved shifting and braking. Popular for fitness bikes and entry-level road bikes. Offers 9-speed gearing and better ergonomics than Claris.
  • Tiagra: Mid-range option with 10-speed gearing and better materials. Good balance of performance and value. Features compact cranksets for easier climbing.
  • 105: Considered the sweet spot for many riders. 11-speed with excellent shifting precision and durability. Available in mechanical and Di2 electronic versions. Weighs around 2,250 grams.
  • Ultegra: High-performance components used by serious enthusiasts and amateur racers. Available in mechanical and electronic (Di2) versions. Features carbon fiber in key components and weighs approximately 2,000 grams.
  • Dura-Ace: Professional-grade groupset with maximum performance, lightest weight, and electronic shifting only. Uses premium materials like titanium and carbon fiber. Weighs under 1,900 grams complete.

SRAM groupset hierarchy and characteristics

SRAM takes a different approach with its tiered system, emphasizing wireless technology and wider gear ranges:

  • Apex: Entry-level components focusing on simplicity and reliability. Often features 1x drivetrain options for easier operation. Weighs approximately 2,700 grams complete.
  • Rival: Mid-range with 12-speed gearing and electronic (eTap AXS) options. Good value for performance-oriented riders. Features wider gear ranges for varied terrain.
  • Force: High-performance groupset with wireless electronic shifting standard. Lighter weight and better materials than Rival. Popular among competitive amateurs.
  • Red: Professional-grade components with maximum weight savings and performance. Fully wireless AXS technology. Weighs under 1,800 grams complete.

Campagnolo groupset hierarchy and characteristics

Campagnolo offers Italian-made components with unique features and premium positioning:

  • Centaur: Entry-level offering from Campagnolo with 13-speed gearing and good performance characteristics. Features Italian design and manufacturing.
  • Chorus: Mid-range option with excellent shifting and braking performance. Available in mechanical and EPS electronic versions. Popular among enthusiasts who prefer Campagnolo’s ergonomics.
  • Record: High-performance groupset with carbon fiber components and precise shifting. Weighs approximately 1,950 grams complete. Features Campagnolo’s unique Ultra-Shift technology.
  • Super Record: Professional-grade with maximum performance, lightweight materials, and advanced electronic shifting. Weighs under 1,800 grams. Features titanium and ceramic components.

What performance differences exist between groupset tiers?

Illustration: What performance differences exist between groupset tiers?

Performance differences between groupset tiers become apparent in weight, shifting technology, and braking capabilities. Understanding these distinctions helps you determine which tier matches your riding needs.

Weight and material differences across tiers

Weight savings increase significantly as you move up groupset tiers. Entry-level groupsets use aluminum and steel components, weighing 2,500-2,800 grams complete. Mid-range options reduce weight to 2,200-2,400 grams using better aluminum alloys and some carbon fiber. High-end groupsets achieve 1,800-2,100 grams through extensive carbon fiber use and titanium hardware. Professional groupsets can weigh under 1,800 grams, with the lightest configurations around 1,600 grams. These weight differences translate to approximately 30-60 seconds saved per hour of climbing, depending on gradient and rider weight.

Shifting performance and electronic options

Shifting technology varies dramatically across groupset tiers. Mechanical systems use cables and require manual adjustment for optimal performance. Entry-level mechanical shifting might need adjustment every few hundred miles, while high-end mechanical systems maintain precision longer. Electronic shifting eliminates cable stretch and provides consistent, lightning-fast shifts. Shimano Di2 uses wired connections for reliable power delivery. SRAM AXS offers fully wireless operation with customizable shift patterns. Campagnolo EPS provides Italian-engineered electronic precision. Electronic systems enable features like multi-shift (holding the lever for multiple gear changes) and synchronized shifting (front and rear derailleurs working together).

Braking performance and technology

Braking technology has evolved significantly, with disc brakes now dominating higher tiers. Rim brakes remain common on entry-level groupsets due to lower cost and simpler maintenance. Mechanical disc brakes appear on mid-range options, offering improved wet-weather performance. Hydraulic disc brakes dominate high-end groupsets, providing superior modulation, power, and consistency. Electronic integration allows features like automatic brake pad adjustment and wear monitoring. Disc brakes enable wider tire clearance and improve overall bike handling in varied conditions.

Before upgrading your groupset, consider whether your riding style actually demands professional-level components. The biggest performance jump isn’t from entry to mid-tier, but from mid to high-tier groupsets. Most recreational riders get 90% of the performance benefits from mid-tier options at 60% of the cost. For most cyclists, groupsets like Shimano 105, SRAM Rival, or Campagnolo Chorus provide excellent performance without the premium price of top-tier components. Focus on choosing components that match your riding frequency, terrain, and performance goals rather than simply buying the most expensive option available. Beginners should also review our Essential Cycling Tips for Beginners Starting Their Journey before making major equipment decisions.

Road Bike Frames Explained: Materials and Geometry

Illustration: How Road Bike Frame Materials Affect Performance

Road cycling frames explained: your frame choice determines 70% of your ride quality before you even touch the pedals. The frame is the heart of your bicycle, and understanding how materials and geometry work together will help you find the perfect ride for your needs.

Road bike frames explained: materials and geometry

  • Frame materials determine weight, stiffness, and comfort — carbon offers the best strength-to-weight ratio while steel provides unmatched durability
  • Geometry measurements like stack and reach dictate fit and riding position — lower, longer frames are more aerodynamic while higher, shorter frames prioritize comfort
  • Your riding style should drive frame choice — racers need aggressive geometry while endurance riders benefit from upright positioning

How Road Bike Frame Materials Affect Performance

Illustration: How Road Bike Frame Materials Affect Performance

The material your frame is made from affects everything from how the bike feels on rough roads to how much it weighs when climbing hills. Each material offers a different balance of weight, stiffness, comfort, and cost.

Carbon Fiber vs Aluminum vs Steel vs Titanium: What’s the Real Difference?

  • Carbon Fiber: The standard for high-performance racing. It offers the best strength-to-weight ratio, allowing for extremely lightweight and stiff frames that can be tuned to absorb road vibrations. It is highly customizable in shape, allowing for aerodynamic, non-welded designs.
  • Aluminum (Alloy): A popular, affordable, and durable choice. It is light and stiff, providing a very responsive, “zippy” ride. Modern aluminum frames often use specialized shaping (hydroforming) to improve comfort, though they can still feel “harsher” on rough roads compared to carbon.
  • Steel (Chromoly): Valued for its durability, longevity, and “soul”—offering a smooth, natural compliance that absorbs road chatter. It is generally heavier than carbon or aluminum, making it ideal for touring or long-distance endurance rather than climbing.
  • Titanium: Often considered a “forever” bike material. It combines the light weight of aluminum with the comfort of steel, while being immune to rust and corrosion. It is expensive and labor-intensive to manufacture.

How Frame Materials Impact Ride Quality and Cost

The material you choose directly impacts your riding experience and budget. Carbon fiber frames typically weigh 1.5-2.5 pounds and cost $2,000-$10,000, making them the lightest and most expensive option. Aluminum frames weigh 2.5-3.5 pounds and cost $800-$3,500, offering excellent value for performance. Steel frames weigh 3.5-5 pounds and cost $1,000-$4,000, prized for their durability and smooth ride quality. Titanium frames weigh 2.5-3.5 pounds and cost $3,000-$8,000, combining the best qualities of both carbon and steel.

Stiffness versus comfort is a key trade-off. Carbon fiber can be engineered to be stiff where needed for power transfer while remaining compliant over bumps. Aluminum tends to be uniformly stiff, which can feel harsh on long rides. Steel naturally absorbs vibrations, providing a comfortable ride even on rough roads. Titanium offers a middle ground with excellent vibration damping.

Durability and maintenance also vary by material. Carbon fiber requires careful handling to avoid damage from impacts. Aluminum is very durable but can develop fatigue cracks over time. Steel can rust if not properly maintained but is highly repairable. Titanium is virtually immune to corrosion and can last decades with minimal maintenance. To keep your investment in top condition, follow a Complete Bike Maintenance Checklist Every Cyclist Should Follow.

Understanding Road Bike Frame Geometry

Illustration: Understanding Road Bike Frame Geometry

Geometry determines how a bike handles and fits your body. Even two bikes made from the same material can feel completely different based on their geometric design.

Stack and Reach: The Most Important Fit Measurements

Stack is the vertical height from the bottom bracket to the head tube, while reach is the horizontal distance between these points. These two measurements are the most critical for determining if a frame will fit you properly. A lower, longer frame (low stack, long reach) is more aerodynamic and “race-oriented,” positioning you in a forward-leaning posture that reduces wind resistance. A higher, shorter frame (high stack, short reach) is more “endurance-oriented,” keeping you in a more upright position that reduces strain on your back and neck during long rides.

To find your ideal stack:reach ratio, measure your current bike’s dimensions and consider your flexibility and riding goals. Most endurance bikes have a stack:reach ratio above 1.5, while race bikes typically fall below 1.4. If you’re unsure, a ratio between 1.45-1.55 offers a good balance for most recreational riders.

Head Tube Angle and Chainstay Length: Handling Characteristics

Head tube angle affects steering responsiveness. A steeper angle (closer to 90°) means faster, more responsive steering suited to criteriums and technical courses where quick direction changes are needed. A slacker angle provides stability, often found on endurance bikes and gravel bikes where high-speed stability is more important than lightning-quick handling.

Chainstay length influences both handling and power transfer. Shorter chainstays (16-16.5 inches) offer quicker handling and better power transfer for climbing, making the bike feel more agile and responsive. Longer chainstays (16.5-17 inches) improve stability and allow for wider tires, which is beneficial for endurance riding and mixed terrain.

Wheelbase and Frame Types: Stability vs Agility

Wheelbase is the distance between the front and rear axles. A longer wheelbase increases stability at high speeds, making the bike feel more planted and secure when descending or riding in a pack. A shorter wheelbase makes the bike more agile and responsive, ideal for racing and technical riding where quick maneuvers are essential.

Frame types are designed around these geometric principles. Race/performance frames feature a lower, more aggressive, and aerodynamic riding position with twitchy handling that rewards skilled riders. Endurance/sportive frames are built for comfort, featuring a more upright position, longer wheelbase, and stability for long-distance riding. Aero frames are specifically designed to minimize aerodynamic drag, often featuring deeper tube shapes and more aggressive, forward-leaning positioning.

How Frame Choice Affects Riding Style

Illustration: How Frame Choice Affects Riding Style

Your riding goals should drive your frame selection. The right combination of material and geometry can transform your cycling experience. If you’re just starting out, consider following a structured approach with a Beginner Cycling Training Plan: Build Your Fitness Safely to complement your frame choice.

Race vs Endurance vs Aero: Which Frame Fits Your Goals?

  • Race/Performance: Features a lower, more aggressive, and aerodynamic riding position with twitchy handling. Ideal for criteriums, road races, and time trials where every second counts. Best paired with carbon fiber for maximum stiffness and minimum weight.
  • Endurance/Sportive: Built for comfort, featuring a more upright position, longer wheelbase, and stability for long-distance riding. Perfect for century rides, gran fondos, and recreational cycling. Often uses aluminum or steel for durability and comfort.
  • Aero: Specifically designed to minimize aerodynamic drag, often featuring deeper tube shapes and more aggressive, forward-leaning positioning. Excellent for time trials, triathlons, and flat road racing. Typically uses carbon fiber for shape optimization and weight savings.

Real-World Performance: What Frame Choice Means for Your Rides

Climbing performance is heavily influenced by frame weight and geometry. Shorter chainstays and lighter materials like carbon fiber excel on steep climbs, allowing you to accelerate quickly and maintain speed on rolling terrain. Steel frames, while heavier, provide excellent power transfer and can feel more stable on technical climbs.

Long-distance comfort becomes crucial on rides over two hours. Endurance geometry with its upright position reduces strain on your back, neck, and hands. Materials with natural compliance like steel or titanium absorb road vibrations that would otherwise fatigue you. Wider tire clearance, often found on endurance frames, allows you to run lower pressures for additional comfort.

Racing performance demands a different approach. Aerodynamic positioning and frame stiffness matter most when you’re trying to maintain high speeds in a pack or break away from the group. Carbon fiber’s ability to be molded into aerodynamic shapes while remaining lightweight makes it the material of choice for competitive racing.

Mixed terrain riding requires a balanced approach. Gravel and adventure riding benefit from durable materials like steel or titanium, combined with geometry that offers stability without sacrificing agility. Frame features like rack mounts, wider tire clearance, and disc brake compatibility become important considerations. You might also want to explore Finding the Best Cycling Routes Near You: A Local Guide to discover new mixed-terrain adventures.

The perfect road bike frame isn’t about having the most expensive carbon or the trendiest geometry — it’s about matching materials and measurements to your body and riding style. If you’re unsure where to start, visit a local bike shop and ask to test ride three different frame materials back-to-back. The one that feels most comfortable after 20 minutes is likely your best choice, regardless of what the spec sheet says. For those new to the sport, you might also want to check out some Essential Cycling Tips for Beginners Starting Their Journey to build confidence on the road.

Road bike frames explained: materials and geometry

  • Frame materials determine weight, stiffness, and comfort — carbon offers the best strength-to-weight ratio while steel provides unmatched durability
  • Geometry measurements like stack and reach dictate fit and riding position — lower, longer frames are more aerodynamic while higher, shorter frames prioritize comfort
  • Your riding style should drive frame choice — racers need aggressive geometry while endurance riders benefit from upright positioning

Road Bike Tires Comparison: Choose the Right Ones

Illustration: Road Bike Tire Width: 23mm vs 28mm vs 32mm — Which is Best?

Road cyclists are abandoning 23mm tires in 2026 — here’s the data-backed width that balances speed and comfort.

Choose road bike tires based on your riding conditions

  • 28-32mm width optimal for most riders — balances speed and comfort (2024 data)
  • Slick tread for dry pavement, file tread for wet conditions
  • High TPI (120+) for speed, reinforced belts for puncture protection
  • Check frame clearance (28-32mm fits most modern road bikes)

Road Bike Tire Width: 23mm vs 28mm vs 32mm — Which is Best?

Illustration: Road Bike Tire Width: 23mm vs 28mm vs 32mm — Which is Best?

Why 28-32mm is the New Standard for 2026

Modern road tires have evolved dramatically since 2020. Lab data from Elite-Wheels (2024) and Rene Herse Cycles (2025) shows 28-32mm tires now deliver the optimal balance of speed and comfort for most riders.

23mm tires: Traditional racing width, still used by some pros on ultra-smooth courses. Rolling resistance is lowest, but comfort suffers on rough pavement. Best for: elite racers on perfect tarmac, weight weenies, or riders with very smooth roads.

28mm tires: The sweet spot for 2026. Tests show 28mm tires roll nearly as fast as 23mm on smooth roads while providing 30% more comfort on rough surfaces. This width has become the default for pro teams in classics and stage races.

32mm+ tires: Maximum comfort and puncture resistance. Rolling resistance increases slightly but remains competitive. Best for: endurance riders, gravel-adjacent routes, heavier riders (over 180 lbs), or anyone prioritizing comfort over marginal speed gains.

The pro peloton’s shift tells the story: In 2019, most racers used 23mm. By 2024, 28mm became standard, with many teams running 30-32mm for cobbled classics. This isn’t just comfort — data shows wider tires can be faster when road surfaces aren’t perfectly smooth. For the latest Top Road Bike Reviews 2024, check manufacturer specifications for tire clearance compatibility.

Frame Clearance: Will Your Bike Fit Wider Tires?

Before upgrading, check if your frame can accommodate wider tires. Most modern road bikes from 2018 onward fit 28-32mm tires, but older frames may be limited.

Quick measurement method: Remove your current tire and measure the width across the tread. Check your frame’s specifications online or in the manual for maximum tire clearance. Look for the “max tire width” specification.

The 4mm rule: For optimal performance and to prevent rubbing, maintain at least 4mm of clearance on each side between the tire and frame. This means if you’re currently running 25mm tires, you can likely fit up to 32mm without issues.

Clearance check steps:

  1. Measure your current tire width (printed on sidewall or with calipers)
  2. Find your frame’s max tire clearance spec
  3. Calculate the difference — if it’s 7mm or more, you can upgrade
  4. For tubeless setups, add 1-2mm to account for tire expansion when seated

If your frame is clearance-limited, consider upgrading to higher TPI tires in your current width before expanding width — you’ll still gain significant performance benefits.

Tire Tread Patterns: Slick vs File Tread vs Knobby for Road Conditions

Illustration: Tire Tread Patterns: Slick vs File Tread vs Knobby for Road Conditions

Slick Tread: The Speed King for Dry Pavement

Slick tread tires dominate road racing for one reason: they have the lowest rolling resistance on smooth pavement. Without tread blocks to deform, the rubber contacts more surface area, creating a larger contact patch that grips through adhesion rather than mechanical interlocking.

Benefits of slick tread:

  • Lowest rolling resistance — fastest on dry roads
  • Most efficient power transfer
  • Longest tread life (no blocks to wear unevenly)
  • Best for racing, group rides, and dry climates

When to choose slick: If you ride primarily on smooth pavement in dry conditions, race competitively, or want maximum efficiency. Slick tires are ideal for criteriums, time trials, and summer group rides where road surfaces are predictable.

Top slick options: Continental GP5000, Pirelli P Zero Race TLR, Schwalbe Pro One. These tires combine slick tread with high TPI casings for maximum speed.

File Tread: The Wet Weather Solution

File tread tires feature minimal directional grooves that provide slight water evacuation without significantly increasing rolling resistance. Think of them as “slicks with insurance.”

File tread vs slick comparison:

  • Slightly higher rolling resistance (2-3% penalty)
  • Better grip on damp or slightly wet roads
  • Improved cornering confidence in mixed conditions
  • Minimal weight penalty

When file tread excels: Morning rides with dew on the roads, coastal areas with high humidity, spring and fall riding when conditions are unpredictable, or any rider who values confidence over marginal speed gains.

Real-world performance: File tread tires maintain 95% of slick tire speed while providing noticeably better grip when roads are slightly damp. The tread pattern helps prevent hydroplaning on very wet surfaces, though deep water still requires more aggressive tread.

Knobby Tread: Why It’s Rare for Pure Road Bikes

Knobby tread increases rolling resistance dramatically — often 15-20% slower than slicks on pavement. The tread blocks deform and squirm under load, wasting energy that could be used for forward motion.

Why road cyclists avoid knobby:

  • Excessive rolling resistance on pavement
  • No performance benefit on smooth surfaces
  • Heavier weight due to reinforced sidewalls
  • Shorter tread life from uneven wear

Exceptions where knobby makes sense: If you regularly ride gravel roads that connect to pavement, consider a “gravel-to-road” tire with a smooth center section and knobby edges. These compromise between surfaces but still roll reasonably well on pavement.

Puncture Resistance: TPI and Protection Belts Compared

TPI Trade-off: Speed vs Protection

TPI (Threads Per Inch) measures the density of the tire casing. Higher TPI means more, finer threads, creating a suppler tire that conforms better to road surfaces.

High TPI (120+): Supple, fast, comfortable

  • Lower rolling resistance due to better road conformity
  • More comfortable ride quality
  • More vulnerable to cuts and punctures
  • Ideal for racing and dry conditions

Low TPI (60-90): Stiffer, more protective

  • Higher rolling resistance but more durable
  • Better puncture resistance
  • Less comfortable on rough roads
  • Good for training, commuting, or rough roads

The real-world impact: High TPI tires can be 5-8% faster in rolling resistance tests but may require 2-3 tire changes per season for frequent riders. Low TPI tires might be 3-5% slower but last 50% longer and flat less often.

Protection Belts: Kevlar vs Nylon vs None

Protection belts add layers between the tread and casing to prevent punctures from reaching the inner tube.

Kevlar belts: Maximum protection

  • Best against sharp objects (glass, thorns)
  • Slightly heavier (20-30g per tire)
  • More expensive
  • Ideal for commuters, training, or puncture-prone areas

Nylon belts: Balanced protection

  • Good protection against common hazards
  • Lighter than Kevlar (10-20g per tire)
  • More affordable
  • Great all-around choice for most riders

No belts: Pure speed focus

  • Lightest weight
  • Highest performance potential
  • Highest puncture risk
  • Best for racing on clean courses

Top belt-equipped tires: Pirelli Cinturato Velo (Kevlar), Continental Grand Prix 5000 (nylon), Schwalbe G-One (Kevlar). These tires add minimal weight while significantly reducing flat frequency.

Tubeless Setup: The Best Defense Against Flats

Tubeless tires eliminate the inner tube, allowing you to run lower pressures for better comfort and traction. The liquid sealant inside automatically seals small punctures.

Tubeless benefits:

  • Sealant fixes punctures up to 5mm instantly
  • Lower pressure = more comfort and grip
  • Reduced rolling resistance (no tube friction)
  • Fewer flats overall — studies show 60-80% reduction

Tubeless requirements: Tubeless-ready tires, tubeless-compatible rims, tubeless valve stems, and sealant. The initial setup takes about 30 minutes but pays dividends in flat prevention.

Real-world performance: Professional teams have largely switched to tubeless for training and many races. The technology has matured to the point where tubeless tires perform identically to clinchers in rolling resistance while providing superior puncture protection.

The biggest tire mistake most cyclists make is choosing based on looks rather than conditions. Here’s your exact next step: measure your current tire width, check if it’s 28-32mm, and if not, upgrade to the width that matches your riding conditions. Most cyclists gain 2-3% speed and 30% more comfort with the right width.

Cycling Power Meters Explained: Training with Data

Illustration: What is a Cycling Power Meter and How Does It Work?

A cycling power meter is a device that measures the exact wattage output of a rider, providing objective data that isn’t affected by wind, fatigue, or terrain. Unlike heart rate monitors that lag behind effort, power meters give instant feedback on how hard you’re actually working, making them essential tools for serious cyclists in road cycling.

Key Takeaway

  • Power meters measure exact wattage output using strain gauges in pedals, cranks, or hub

  • FTP (Functional Threshold Power) is the maximum wattage sustainable for one hour

  • Training with power provides objective data unaffected by wind, fatigue, or terrain

  • Elite female cyclists typically have FTP of 4.5-5.5 W/kg

  • Power data enables precise training zones and progress tracking

What is a Cycling Power Meter and How Does It Work?

Illustration: What is a Cycling Power Meter and How Does It Work?

Strain Gauges and Torque Measurement Explained

A cycling power meter uses electrical sensors called strain gauges to detect minute bending in the crank or pedal spindle when you push down. These strain gauges measure torque, which is the force you apply to the pedals. The system then multiplies this torque by your cadence (pedal revolutions per minute) to calculate real-time wattage. This provides an instantaneous, objective measurement of your power output that doesn’t change based on external factors like temperature or how tired you are. The technology works by detecting the tiny deformations that occur when you apply force to the pedals, converting these physical changes into electrical signals that the meter processes into wattage readings.

The strain gauges themselves are incredibly sensitive devices, typically made from a thin metallic foil arranged in a specific pattern. When the material stretches or compresses under force, its electrical resistance changes in a predictable way. The power meter’s internal electronics measure these resistance changes and convert them to force measurements. Most modern power meters use four strain gauges arranged in a Wheatstone bridge configuration, which provides excellent accuracy by canceling out temperature effects and other environmental factors. This sophisticated sensing technology allows power meters to detect force changes as small as a few grams, translating to precise wattage readings even at very low power outputs.

Power Meter Types: Pedals, Cranks, and Hub Options

  • Pedal-based: Sensors built into the pedal body or axle measure force exactly where it’s applied. These are easy to install and swap between bikes, making them popular for riders with multiple bicycles. Brands like Garmin Vector and Favero Assioma offer pedal-based systems that typically cost between $600-$1,200. The main advantage is portability – you can move them between bikes in minutes without tools.

  • Crank-based: Strain gauges are positioned within the crank arm or spider (chainrings). These units require specific cranksets but offer good accuracy and are relatively simple to interchange between compatible bikes. Popular options include Shimano’s R9100-P and SRAM’s RED AXS power meter cranks, which range from $800-$1,500. These systems provide excellent accuracy and battery life, often lasting 100-200 hours per charge.

  • Hub-based: Sensors are mounted in the rear wheel hub. These measure total power output from both legs but require wheel changes when switching bikes. Companies like PowerTap pioneered this technology, with hub-based systems typically priced between $500-$900. While less common now due to pedal and crank options, hub-based meters offer exceptional accuracy and work with any crankset or pedal system.

Understanding FTP and Training Zones

What is Functional Threshold Power (FTP)?

FTP is the maximum wattage you can sustain for one hour, which serves as the foundation for all power-based training. This single number determines your training zones and helps structure workouts effectively. Elite female cyclists typically have FTP ranging from 4.5 to 5.5 watts per kilogram of body weight, though recreational riders might be in the 2.5 to 3.5 W/kg range. Knowing your FTP allows you to train at specific intensities rather than guessing, ensuring easy rides are truly easy and hard intervals are actually challenging enough to drive improvement.

Your FTP represents the highest power you can maintain in a quasi-steady state without fatiguing. It’s essentially your lactate threshold – the point where your body produces more lactate than it can clear. This physiological marker is crucial because training just below or just above your FTP produces different adaptations. Riding at 90-95% of FTP improves your ability to sustain hard efforts, while intervals at 105-120% FTP increase your maximum sustainable power. The beauty of FTP is that it’s a single, measurable number that correlates strongly with endurance performance across all cycling disciplines, from time trials to road races to gran fondos.

Key Power Metrics: Normalized Power, IF, and TSS

  • Normalized Power (NP): Estimates the true physiological cost of a ride by accounting for surges and coasting periods, giving a more accurate picture than average power alone. For example, a ride with lots of hard efforts followed by coasting might have an average power of 200 watts but a normalized power of 250 watts, indicating a much harder workout than the average suggests.

  • Intensity Factor (IF): Shows how hard a workout was compared to your FTP. An IF of 1.0 means you rode at exactly your FTP for the entire ride. IF values below 0.75 indicate easy recovery rides, while values above 1.05 suggest very hard efforts. This metric helps you understand the relative difficulty of different workouts regardless of duration.

  • Training Stress Score (TSS): Measures the total workload of a ride, helping you manage fatigue and plan recovery. Higher TSS values indicate more demanding workouts. A 1-hour ride at FTP equals 100 TSS points. This system allows you to track your training load over weeks and months, ensuring you’re building fitness without overtraining.

Benefits of Training with Power Data

Instantaneous Data vs Heart Rate Limitations

Unlike heart rate, which lags behind effort (you might wait 30-60 seconds for your heart rate to rise on a climb), power is instant. This immediate feedback lets you adjust your effort in real-time. Power is also not affected by wind, fatigue, or caffeine intake, making it a more reliable metric for tracking fitness. While heart rate can be influenced by stress, temperature, and hydration status, power output directly reflects the actual work you’re performing, regardless of external conditions.

The instantaneous nature of power data is particularly valuable during interval training. When you’re doing 30-second all-out efforts, your heart rate might not even register the effort until the interval is almost over. Power meters show you exactly what you’re producing in the moment, allowing you to hit precise targets. This is crucial for structured workouts where the goal is to train specific energy systems. For example, VO2 max intervals at 110-120% FTP require exact power targets to be effective – something heart rate simply cannot provide due to its delayed response.

Precise Intensity and Progress Tracking

  • Exact intensity control: You can train at precise intensity levels, ensuring easy rides are easy and hard intervals are hard enough. This eliminates the guesswork that comes with perceived exertion or heart rate alone. For instance, recovery rides should be below 55% of FTP to promote active recovery without adding stress, while tempo rides target 76-90% FTP for building aerobic endurance.

  • Fitness monitoring: By testing your FTP periodically, you can track fitness improvements over time. Seeing your FTP increase from 200 to 220 watts, for example, provides concrete evidence of progress. Most cyclists retest FTP every 4-8 weeks, using the results to adjust training zones and ensure continued progression.

  • Pacing strategy: Power meters enable precise pacing during long climbs, time trials, and races, helping you avoid “blowing up” by maintaining sustainable effort levels throughout. In a 40km time trial, knowing your optimal power output (often 90-95% of FTP) helps you distribute effort evenly and achieve your best possible time.

The most surprising finding about power meters is that they can actually make training more enjoyable by removing uncertainty. Instead of wondering if you’re working hard enough or too hard, you have concrete data guiding your efforts. To get started with power-based training, test your FTP using a 20-minute time trial test, then use that number to set your training zones. You can find more cycling training resources and beginner tips at our beginner cycling training plan page, which includes structured workouts for all fitness levels.