Cycling Hydration Packs: Staying Hydrated on Long Road Rides

Illustration: Best Cycling Hydration Packs for Long Road Rides

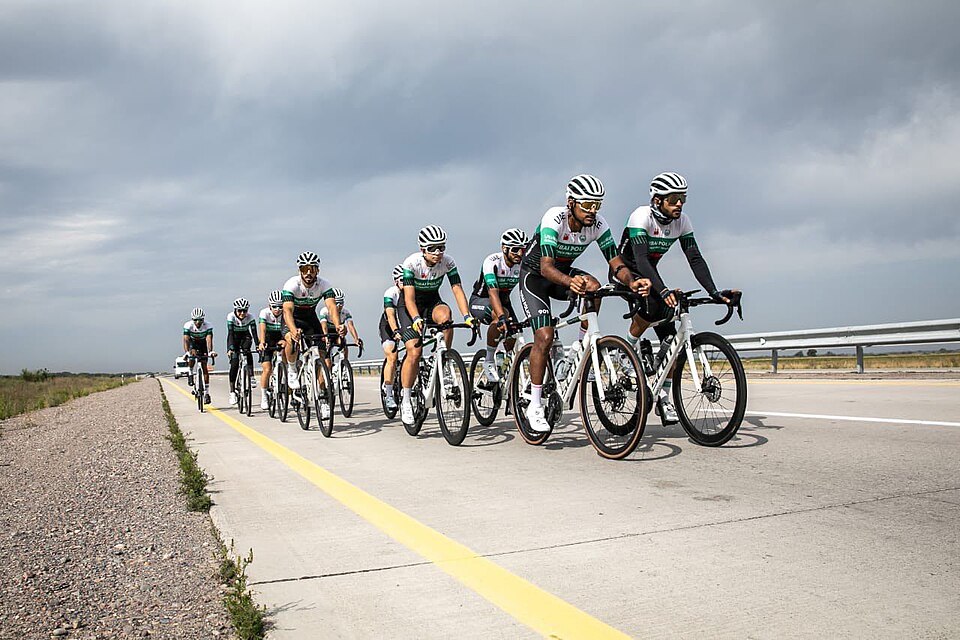
For long road rides, proper hydration prevents a decline in performance and cognitive function. Professional cyclists like Emma Johansson, nicknamed “Silver Emma” for her consistent podium finishes, know that hydration management is critical for endurance at the highest levels, including the Olympics.

Key Takeaway

  • Velocio Hydration Pack ($199) is the best overall for road/gravel cycling with its 1.5L bladder and minimal design

  • Drink 17–34 ounces of water per hour during long rides to prevent performance decline

  • Osprey Syncro 12 ($157–$185) offers 2.5L reservoir and superior ventilation for all-day rides

  • CamelBak Chase Race 4 ($75–$126) provides high accessibility with breathable mesh harness

  • Pre-hydrate with 16–20 ounces of fluid 2 hours before starting your ride

Best Cycling Hydration Packs for Long Road Rides

Illustration: Best Cycling Hydration Packs for Long Road Rides

Top 4 Hydration Packs Compared: Features and Prices

Model

Price

Capacity

Key Features

Velocio Hydration Pack

$199

1.5L bladder

Minimal design, expandable cargo pockets, next-to-body fit

CamelBak Chase Race 4

$75–$126

1.5L bladder

Breathable mesh harness, high accessibility above jersey pockets

Osprey Syncro 12

$157–$185

2.5L reservoir

AirSpeed back panel, superior ventilation for hot days

EVOC Hydro Pro 6

$128–$150

1.5L bladder

Slim profile, quick side access, comfortable without bouncing

For road cyclists tackling long distances, the Velocio Hydration Pack stands out as the best overall choice. Its 1.5L bladder and minimal design make it feel like it “disappears” during rides, eliminating weight shifts that can throw off balance. The expandable cargo pockets provide essential storage for tools, snacks, and extra layers without adding bulk. This pack excels on road and gravel surfaces where aerodynamics and weight distribution matter most.

The CamelBak Chase Race 4 excels in accessibility, sitting high above jersey pockets for easy reach during intense efforts. Its breathable mesh harness prevents overheating, making it ideal for riders who need frequent hydration access without breaking their rhythm. The vest-style design distributes weight evenly across your chest and back, reducing pressure points during long hours in the saddle. This makes it particularly valuable for competitive cyclists who can’t afford to slow down for bottle exchanges.

For all-day adventures, the Osprey Syncro 12’s 2.5L reservoir and AirSpeed ventilation system keep you cool and hydrated through the hottest conditions. The AirSpeed back panel creates a gap between your back and the pack, allowing air to circulate and prevent the sweat buildup that can lead to discomfort and chafing. This pack also includes additional storage compartments for tools, nutrition, and emergency gear, making it perfect for self-supported rides where you need to carry more than just water.

Lightweight riders or those prioritizing minimal weight should consider the EVOC Hydro Pro 6. Its slim profile and quick side access make it perfect for riders who want hydration without the bulk of traditional backpacks. The pack sits close to your body without bouncing, even on rough road surfaces, and the side access allows you to refill or adjust the bladder without removing the entire pack. This convenience factor can be crucial during long rides when stopping frequently becomes tiring — road cycling.

Each pack serves different needs: Velocio for overall performance and aerodynamics, CamelBak for accessibility and competitive riding, Osprey for long rides and hot weather, and EVOC for lightweight comfort. Consider your typical ride duration, weather conditions, and storage needs when making your choice. The right hydration pack can transform your long ride experience from a hydration struggle to a seamless, enjoyable journey.

Why Choose a Hydration Pack Over Water Bottles

  • Continuous Access: Allows sipping without reaching for bottles, encouraging more frequent hydration and preventing dehydration during intense efforts. This is particularly valuable on technical descents or in heavy traffic where taking your hands off the bars is dangerous

  • Higher Capacity: Holds 1.5L–3L of fluid compared to standard bottles, crucial for long rides where convenience stores are scarce. A typical bottle cage holds 500-750ml, meaning you’d need to carry 3-4 bottles to match a 2L hydration pack’s capacity

  • Better Balance: Keeps weight centered on your back rather than on the bike frame, improving handling and stability on technical roads. Frame-mounted bottles can affect your bike’s handling characteristics, especially when they’re nearly empty and create uneven weight distribution

Hydration Strategies for Endurance Cycling Performance

Illustration: Hydration Strategies for Endurance Cycling Performance

How Much to Drink: The 17–34 Ounce Per Hour Rule

During long road rides, aim to drink 17–34 ounces of water per hour, roughly equivalent to one standard bottle. This range accounts for individual sweat rates, temperature, and intensity. The key is consistency: sip small amounts every 15-20 minutes rather than consuming large quantities at once. This approach maintains optimal hydration levels without overwhelming your digestive system or causing uncomfortable sloshing.

Timing matters for absorption. Start drinking within the first 10-15 minutes of your ride to establish a hydration rhythm. If you wait until you feel thirsty, you’re already behind on hydration. For most riders, this translates to about 2-3 gulps every 15 minutes. Adjust upward in hot conditions or during high-intensity efforts when sweat rates increase significantly. Professional cyclists often use sweat rate testing to determine their exact hydration needs under different conditions.

Monitor your performance as a hydration indicator. If you notice a sudden drop in energy, difficulty concentrating, or slower reaction times, these may signal dehydration. Professional cyclists like Emma Johansson track their hydration meticulously because even slight dehydration can cost seconds in competitive situations. For recreational riders, proper hydration prevents the fatigue and cognitive decline that can turn an enjoyable ride into a struggle. Consider weighing yourself before and after rides to understand your personal sweat rate and refine your hydration strategy.

Electrolyte Replacement and Urine Color Monitoring

  • Electrolyte Guidelines: For rides over one hour, switch from plain water to electrolyte drinks to replace sodium lost through sweat. Look for salty streaks on clothing as an indicator of heavy electrolyte loss. Aim for drinks containing 200-300mg of sodium per 16oz to match typical sweat sodium concentrations

  • Urine Color Indicators: Dark yellow urine signals dehydration and the need for immediate fluid intake. Clear urine may indicate overhydration, which can dilute essential electrolytes and lead to hyponatremia. Pale yellow, similar to lemonade, represents optimal hydration

  • Performance Connection: Proper electrolyte balance prevents muscle cramps and maintains nerve function, both critical for safe cycling control. Electrolytes also help your body absorb and retain fluids more effectively than plain water alone

Pre-Ride Hydration and Long-Term Performance

Pre-Hydration: Starting Your Ride Properly Hydrated

Begin drinking 16–20 ounces of fluid approximately two hours before your ride starts. This pre-hydration window allows your body to absorb and distribute fluids throughout your system, ensuring you start your ride in an optimal state. Drinking too close to departure time can lead to frequent bathroom stops or that uncomfortable “sloshing” feeling during early miles.

Proper pre-hydration prevents early fatigue and helps maintain cognitive function during long rides. When you’re well-hydrated from the start, your body can focus energy on pedaling rather than catching up on fluid deficits. This is especially important for morning rides when you’ve gone 8-10 hours without fluids overnight. Consider your pre-ride meal timing as well—eating too close to departure can affect hydration absorption and comfort.

Combine pre-hydration with a balanced meal containing some sodium to help your body retain fluids. Avoid excessive caffeine, which can have a mild diuretic effect. Professional cyclists like Emma Johansson follow strict pre-ride hydration protocols because starting a long ride even slightly dehydrated compounds throughout the day, leading to significant performance degradation by the final hours. A good rule of thumb: if you’re not urinating clear or pale yellow before your ride, you’re likely starting dehydrated.

Hydration and Olympic-Level Performance

Hydration management is critical for performance and endurance at the highest levels of cycling. Emma Johansson competed at the Olympics and other elite competitions where proper hydration prevented decline in performance and cognitive function. At this level, even a 2% reduction in body weight from fluid loss can measurably impact power output and decision-making ability. Olympic cyclists often work with sports scientists to develop personalized hydration protocols based on sweat testing and environmental conditions.

Professional cyclists use sophisticated hydration strategies, including weighing themselves before and after rides to calculate fluid loss, then replacing 150% of that weight in the recovery period. They also monitor urine color, sweat rates, and electrolyte balance throughout multi-day events. While recreational riders don’t need this level of precision, understanding that hydration directly impacts your ability to think clearly, react quickly, and maintain power output can motivate better hydration habits. The difference between proper and improper hydration can be the difference between finishing strong or bonking on a long ride.

The connection between hydration and performance extends beyond physical fatigue. Dehydration affects your ability to judge distances, react to road hazards, and make tactical decisions during group rides. For road cyclists, where safety depends on quick reactions and clear thinking, proper hydration is as important as having the right equipment or training plan. Consider carrying an extra 0.5-1L of water on unfamiliar routes or in extreme heat—the weight penalty is minimal compared to the risk of dehydration ruining your ride.

The most surprising finding is that professional cyclists like Emma Johansson treat hydration with the same precision as their training plans, weighing themselves before and after rides to calculate exact fluid replacement needs. This level of detail shows how critical hydration is to performance at every level. Start implementing better hydration habits today by pre-hydrating with 16 ounces of water two hours before your next long ride, then maintaining the 17-34 ounce per hour guideline throughout your journey. Your body and your performance will thank you.

Cycling Interval Training: Boost Your Road Cycling Performance

Illustration: The 80/20 Rule: Foundation of Pro Interval Training

Road cyclists can boost power and endurance by 20-30% through structured interval training that targets specific energy systems. Professional cyclists like Emma Johansson use 80/20 training – 80% low-intensity rides for aerobic base development and 20% high-intensity intervals for power gains. This approach builds sustainable fitness while preventing overtraining, making it perfect for amateurs and pros alike.

Key Takeaway

  • 80/20 training: 80% low-intensity rides build aerobic base, 20% high-intensity intervals drive performance gains

  • VO2 max intervals (4x4min @110% FTP) increase maximum oxygen uptake by 5-15% in 6-8 weeks

  • Rønnestad 30/15s protocol delivers 20% more power output than traditional intervals

  • Beginner-friendly 30s hard/1-2min easy intervals improve lactate threshold without excessive fatigue

  • Recovery is critical – allow 48-72 hours between high-intensity sessions for adaptation

The 80/20 Rule: Foundation of Pro Interval Training

Illustration: The 80/20 Rule: Foundation of Pro Interval Training

Why 80% Low Intensity Builds Your Base

Low-intensity rides at 60-70% of maximum heart rate develop your aerobic capacity without causing excessive fatigue. These endurance sessions increase mitochondrial density, improve fat metabolism, and enhance your body’s ability to clear lactate. Professional cyclists like Emma Johansson spend most training hours in this zone to build a robust aerobic foundation that supports higher-intensity work. The low-intensity approach also reduces injury risk and allows for more consistent training volume over time. Studies show that athletes who follow the 80/20 principle improve their FTP (Functional Threshold Power) by 15-25% over a season while maintaining freshness for key races. This training philosophy, popularized by coaches like Stephen Seiler, has become the gold standard for endurance athletes because it maximizes adaptations while minimizing burnout. The aerobic base built during these rides improves your body’s efficiency at utilizing oxygen, allowing you to ride faster with less effort over time.

High-Intensity 20%: When and How Hard

  • 5-minute efforts for power: Build sustained power at 105-110% FTP with 5-minute intervals, 3-4 repetitions. These efforts improve your ability to maintain high power outputs during climbs and breakaways. Research shows 5-minute intervals are optimal for improving VO2 max and lactate threshold simultaneously.

  • 1-minute power climbs: Develop explosive strength with 1-minute all-out efforts at 120-130% FTP. Perfect for short, steep climbs where pure power matters most. These intervals recruit fast-twitch muscle fibers that are crucial for sprinting and climbing.

  • 10-second sprints with 2-minute recovery: Improve neuromuscular coordination and sprint capacity. These short bursts enhance your ability to respond to attacks and finish strong in races. Sprint training also improves your economy at lower intensities.

  • Overgeared efforts: 45-60 RPM: Strengthen leg muscles by riding in a big gear at low cadence for 5-10 minutes. This builds muscular endurance and improves your ability to push big gears on flat terrain. Overgeared work is particularly beneficial for time trialists and triathletes.

VO2 Max Intervals: The Power Boosters

4×4 Minute VO2 Max Workout @110% FTP

Interval

Duration

Intensity

Recovery

Purpose

1

4 minutes

110% FTP

3 minutes easy

Establish target power

2

4 minutes

110% FTP

3 minutes easy

Maintain consistency

3

4 minutes

110% FTP

3 minutes easy

Build fatigue resistance

4

4 minutes

110% FTP

5 minutes easy

Complete the stimulus

This VO2 max workout pushes your cardiovascular system to adapt by working at 110% of your functional threshold power. The 4-minute intervals are long enough to challenge your aerobic system while the 3-minute recovery allows partial recovery without full restoration. Studies show this protocol increases VO2 max by 5-15% over 6-8 weeks when performed twice weekly. The final 5-minute recovery helps clear lactate and prepares you for the next training session. Elite cyclists report 10-20 watt improvements in their 5-minute power after completing this block. The key to success with this workout is maintaining consistent power output throughout each interval rather than starting too hard and fading.

Rønnestad 30/15s: Advanced Power Development

  • 30 seconds high intensity: Ride at 120% FTP, focusing on maintaining consistent power output. This duration is optimal for recruiting fast-twitch muscle fibers while still being aerobic enough to complete multiple repetitions.

  • 15 seconds recovery: Spin easily at 50-60% FTP to allow partial recovery. The short recovery prevents complete fatigue while maintaining elevated heart rate and lactate levels.

  • Repeat 20-40 times: Complete 20-40 total intervals depending on fitness level. Beginners start with 20, advanced riders progress to 40. The total work time ranges from 10-20 minutes of actual effort.

  • Total workout time: 20-30 minutes of actual work within a 40-60 minute session. The format allows high-quality work in less time than traditional intervals, making it ideal for time-crunched athletes.

The Rønnestad protocol, developed by Norwegian researcher Bent Rønnestad, uses short, intense bursts followed by brief recovery periods. This format allows you to maintain higher average power output than traditional longer intervals. The 30/15 structure keeps your heart rate elevated throughout the session while the short recovery periods prevent complete fatigue. Research shows this method produces 20% greater power improvements compared to traditional interval training. Cyclists report feeling fresher after these sessions while still achieving superior adaptations. The protocol is particularly effective for improving anaerobic capacity and repeated sprint ability, both crucial for racing success.

Sweet Spot Training: The Middle Ground

2×20 Minute Sweet Spot Intervals @88-94% FTP

Sweet spot training sits between endurance and threshold work, typically at 88-94% of your functional threshold power. These 2×20 minute intervals provide significant training stimulus without the extreme fatigue of VO2 max work. The sweet spot zone improves your ability to sustain power for 20-60 minute efforts, making it ideal for time trials and breakaways. Each 20-minute interval should be performed at a steady, sustainable effort level where you can just barely complete the full duration. Cyclists typically see 8-12 watt improvements in their 20-minute power after 6-8 weeks of consistent sweet spot training. The beauty of sweet spot training is that it provides 80% of the benefits of threshold work with only 50% of the fatigue, allowing for greater training frequency and consistency.

Beginner Intervals: Start Smart

  • 30 seconds hard/1-2 minutes easy: Start with 5-8 repetitions, gradually building to 10-12. This protocol is perfect for building foundational fitness without overwhelming your system. Focus on maintaining consistent power during hard efforts.

  • 1-minute efforts at 90-95% max HR: Perform 6-8 repetitions with 2-minute recovery. These efforts improve your lactate threshold and aerobic capacity while teaching pacing and effort control.

  • Pyramid intervals: Start with 30 seconds, increase to 1 minute, then decrease back to 30 seconds. This format provides variety while building different energy systems and keeping workouts engaging.

  • Structured group rides: Join rides with designated interval sections for motivation and pacing. Group dynamics can help you push harder than you might alone while providing social accountability.

Beginners should start with shorter, less intense intervals to build fitness safely. The 30 seconds hard/1-2 minutes easy protocol allows adequate recovery while still providing training stimulus. Focus on maintaining consistent power during the hard efforts rather than going all-out. As fitness improves, gradually increase the number of repetitions and reduce recovery time. Always warm up for 15-20 minutes before starting any interval session. Track your progress using a heart rate monitor or power meter to ensure you’re training in the correct zones. The key is progressive overload – gradually increasing the difficulty as your body adapts to the training stimulus. For those just starting out, Essential Cycling Tips for Beginners Starting Their Journey can provide valuable guidance on building a solid foundation — road cycling.

The most surprising finding from interval training research is that amateur cyclists can achieve 80% of professional performance gains with just 20% of the training volume. This means you don’t need to train like a pro to see dramatic improvements – structured, progressive intervals 2-3 times per week can transform your cycling performance. Start with beginner protocols, track your progress with a power meter or heart rate monitor, and gradually increase intensity as your fitness improves. The key is consistency and progressive overload rather than extreme training volumes. Many cyclists find that they can achieve their performance goals while actually training less than they thought necessary, as long as the training is structured and purposeful.

Finding Road Cycling Clubs Near You: A Complete Guide

Illustration: How to Find Road Cycling Clubs Near You

Finding road cycling clubs near you is an effective way to improve riding skills, discover new routes, and enjoy the camaraderie of a group. Active road cycling clubs are commonly found through local bike shops, online platforms like Strava and Facebook, and at regional cycling events.

Key Takeaway

  • Local bike shops are the most reliable starting point for finding cycling clubs and group rides

  • Strava’s ‘Explore Clubs’ feature and Facebook Groups connect you with active local cycling communities

  • USA Cycling Club Finder helps locate registered clubs for racing enthusiasts

  • Community centers, cafes, and bulletin boards are popular hubs for finding cycling groups

  • Trial ‘no-drop’ rides let you test club culture and skill level before committing

How to Find Road Cycling Clubs Near You

Illustration: How to Find Road Cycling Clubs Near You

Start at Local Bike Shops (LBS)

  • Visit local bike shops in your area and ask staff about affiliated cycling clubs or group rides they know about

  • Staff members are typically well-connected within the cycling community and can recommend clubs that match your skill level

  • Many bike shops host their own weekly group rides, which are excellent opportunities to meet local cyclists

  • Check shop bulletin boards for flyers about upcoming club meetings, group rides, and cycling events

  • Ask about shop-sponsored teams or clubs that may offer discounts on equipment and organized training rides

  • Build relationships with shop mechanics who often know about informal riding groups and local cycling networks

  • Many shops organize beginner-friendly rides specifically designed to help new cyclists find their community

  • Shop owners frequently partner with local clubs to provide technical support and equipment advice

  • Some bike shops offer women-only group rides to create welcoming environments for female cyclists

  • Ask about seasonal group rides that may be more common during spring and summer months

Use Digital Tools: Strava and USA Cycling

  • Download the Strava app and use the ‘Explore Clubs’ feature to find cycling groups in your vicinity

  • Search for clubs based on your location, skill level, and riding preferences to find the best matches

  • Join local Facebook Groups dedicated to cycling in your area to connect with active riders and learn about informal group rides

  • Use the USA Cycling Club Finder tool to locate registered clubs, especially if you’re interested in competitive racing

  • Follow local cycling clubs on social media platforms to stay updated on their ride schedules and events

  • Many clubs use WhatsApp or Discord groups for real-time communication about spontaneous rides and weather changes

  • Check club websites for membership requirements, ride calendars, and joining procedures before attending events

  • Strava’s segment leaderboards can help identify active local cyclists and potential riding partners

  • Many clubs maintain active Instagram accounts showcasing their rides and community events

  • Online cycling forums specific to your region often have dedicated sections for finding local riding groups

Community Resources for Finding Cycling Groups

Illustration: Community Resources for Finding Cycling Groups

Check Community Centers and Cafes

  • Visit local coffee shops that are popular with cyclists, as these often serve as informal meeting spots for group rides

  • Check bulletin boards at community centers, libraries, and gyms for flyers about cycling clubs and group rides

  • Ask staff at recreation centers if they know of any cycling groups that use their facilities or meet in the area

  • Visit local cafes during peak cycling hours (early morning weekends) to observe and meet regular cycling groups

  • Community centers often host cycling-related events or have information about local sports clubs that include cycling groups

  • Many libraries now offer bike repair stations and cycling maps, making them excellent resources for finding local riding communities

  • Local breweries and restaurants sometimes sponsor cycling teams, creating natural gathering spots for group rides

  • College campuses often have cycling clubs that welcome community members to their group rides

  • Senior centers may have cycling groups specifically for older adults looking for social riding opportunities

  • YMCA and similar organizations frequently host cycling classes that can lead to finding local riding groups

Attend Regional Cycling Events

  • Participate in local charity rides, cycling festivals, and bike expos to meet club members and learn about different groups

  • Volunteer at cycling events to network with experienced riders who can recommend clubs and group rides

  • Join a trial ‘no-drop’ ride as a guest to experience the club’s pace, skill level, and culture before committing to membership

  • Attend cycling workshops or clinics hosted by local clubs to learn about their training programs and membership benefits

  • Look for cycling-related meetups on platforms like Meetup.com to find informal groups that may lead to club connections

  • Many cities host weekly or monthly group rides that serve as entry points to more structured cycling clubs

  • Check local event calendars for gran fondos and century rides, which often have associated club information booths

  • Local bike races often have pre-race group rides where you can meet potential club members

  • Charity cycling events frequently partner with local clubs for route support and volunteer coordination

  • Community bike festivals often feature club demonstrations and membership sign-up opportunities

Benefits of Joining a Local Cycling Club

Skill Development and Safety Advantages

  • Joining a club provides several advantages, including learning group riding etiquette and proper cycling techniques

  • Discover safe routes in your area that experienced members have tested and recommend for group rides

  • Pick up skills from experienced members, including drafting techniques, paceline formation, and efficient climbing strategies

  • Groups are more visible to traffic, providing a safer environment for riding compared to solo cycling

  • Learn about bike maintenance and equipment through club workshops and experienced member advice

  • Many clubs offer skills clinics covering everything from cornering techniques to nutrition strategies for long rides

  • Access to club insurance coverage for organized rides and events provides additional peace of mind

  • Club members often share knowledge about local road conditions, construction zones, and seasonal hazards

  • Group rides provide opportunities to practice emergency handling skills in a controlled environment

  • Many clubs have designated ride leaders who ensure group safety and proper route navigation

Motivation and Community Camaraderie

  • Provides motivation to keep up with a regular training schedule through group accountability and planned rides

  • Enjoy the camaraderie of a group and discover new routes that you might not find riding alone

  • Build lasting friendships with fellow cyclists who share your passion for road cycling and outdoor adventure

  • Participate in club-sponsored events, races, and social gatherings that strengthen community bonds

  • Access to club discounts on cycling gear, race entries, and training camps that make the sport more affordable

  • Many clubs organize weekend getaways and cycling vacations, creating memorable shared experiences

  • Club newsletters and social media groups keep you informed about local cycling news and opportunities

  • Group rides provide natural opportunities for mentorship between experienced and newer cyclists

  • Club membership often includes access to exclusive training facilities and indoor cycling sessions

  • Many clubs have youth programs that allow families to participate together in cycling activities

The most surprising finding is that many cyclists discover their lifelong riding groups through simple conversations at local bike shops rather than through online searches. One specific action step is to visit three local bike shops this week, ask about group rides, and attend at least one shop-sponsored ride to start building your cycling community connections. For those new to the sport, Complete Bike Maintenance Checklist Every cyclist should follow can help ensure your bike is ready for group rides.

Cycling Cadence Training: Improving Your Pedal Efficiency

Illustration: What Is Cycling Cadence and Why It Matters

Cycling cadence training is the systematic practice of optimizing pedal revolutions per minute (RPM) to enhance cycling performance, reduce fatigue, and improve overall efficiency. Understanding and training your cadence can transform your riding experience, whether you’re a beginner cyclist or an experienced road racer.

Key Takeaway

  • Cadence is pedal revolutions per minute (RPM). Elite cyclists typically ride 90-105 RPM, beginners 60-85 RPM.

  • Higher cadences shift effort from muscles to cardiovascular system, reducing fatigue.

  • Optimal cadence varies by rider type, experience, and riding conditions.

  • Training should combine high-cadence neuromuscular work with low-cadence strength training.

What Is Cycling Cadence and Why It Matters

Illustration: What Is Cycling Cadence and Why It Matters

Cadence Definition: Pedal Revolutions Per Minute (RPM)

Cadence represents the number of complete pedal revolutions you complete in one minute, measured in revolutions per minute (RPM). This fundamental cycling metric directly influences your power output, energy efficiency, and overall riding comfort. Understanding your cadence is crucial because it determines how your body distributes effort between muscular and cardiovascular systems. Higher cadences engage your aerobic system more effectively, while lower cadences rely heavily on muscular strength and can lead to quicker fatigue in your legs. The beauty of cadence training lies in its ability to help you find your optimal pedaling rhythm for different riding conditions and goals.

Research from cycling performance studies shows that cadence directly affects oxygen consumption and muscle activation patterns. When you pedal at higher RPMs, your body shifts from anaerobic (muscle-based) energy production to more aerobic (oxygen-based) metabolism. This shift is particularly beneficial during long rides where muscular endurance becomes a limiting factor. Additionally, proper cadence training can reduce the risk of overuse injuries by distributing stress more evenly across your joints and connective tissues. The relationship between cadence and power output follows the formula: Power = Cadence × Torque, meaning you can achieve the same power output through different combinations of speed and force application.

Elite vs Beginner Cadence Ranges: 90-105 RPM vs 60-85 RPM

Elite cyclists typically maintain cadences between 90-105 RPM during sustained efforts, with some professionals reaching 110 RPM during intense sprints. This higher cadence range allows them to distribute workload more evenly across their cardiovascular and muscular systems, reducing localized muscle fatigue. In contrast, beginner cyclists often ride at 60-85 RPM, relying more heavily on muscular strength and experiencing faster leg fatigue. The difference in cadence ranges reflects not just fitness levels but also pedaling technique efficiency.

Professional cyclists like Chris Froome and Tadej Pogačar are known for their high-cadence riding styles, which they maintain even during long climbs where many riders would naturally slow their pedaling. This approach keeps their muscles fresher for later stages of races and reduces the buildup of lactic acid in their legs. Studies have shown that experienced cyclists can produce the same power output at different cadences, but they choose higher RPMs to optimize energy systems and delay fatigue. The ability to maintain high cadence also correlates with better bike handling skills and smoother power delivery, which are crucial for competitive racing scenarios.

Core Cadence Training Techniques for Better Efficiency

Illustration: Core Cadence Training Techniques for Better Efficiency

High Cadence Drills: 100-110 RPM for Neuromuscular Speed

  • Perform 5-10 minute sessions of 1-minute high-cadence intervals at 100-110 RPM with 1-minute easy recovery periods between sets

  • Focus on maintaining smooth pedal strokes without bouncing in the saddle during high-cadence efforts

  • Start with shorter intervals (30 seconds) and gradually increase duration as your neuromuscular coordination improves

  • Use a light gear that allows you to maintain the target cadence without excessive resistance

  • Practice these drills on a trainer or flat road where you can maintain consistent effort

High-cadence training develops the neuromuscular pathways that control rapid, coordinated muscle contractions. When you train at 100-110 RPM, you’re teaching your nervous system to fire muscles more quickly and efficiently. This type of training is particularly valuable for improving sprinting ability and maintaining speed during group rides where quick accelerations are frequent. The key to effective high-cadence training is smoothness – you want to avoid bouncing in the saddle, which indicates you’re either in too hard a gear or your pedal stroke needs refinement. Over time, these drills will increase your comfortable cadence range and make higher RPMs feel more natural during regular riding.

Low Cadence Training: 60-70 RPM for Strength Development

  • Complete 5×5 minute intervals in a high gear at 60-70 RPM, maintaining Zone 3 intensity throughout

  • Focus on applying steady, controlled pressure throughout the entire pedal stroke during low-cadence efforts

  • Allow adequate recovery between intervals (3-5 minutes) to maintain quality in subsequent efforts

  • Use these sessions to build leg strength and improve your ability to handle steep climbs

  • Gradually increase resistance or duration as your strength improves over several weeks

Low-cadence training builds the muscular strength and force production capacity that complements your cardiovascular fitness. When you pedal at 60-70 RPM in a high gear, you’re developing the type of leg strength that helps on steep climbs and during powerful accelerations. This training also improves your ability to maintain momentum through technical sections of mountain bike trails or during headwind sections on the road. The controlled, forceful nature of low-cadence work strengthens your connective tissues and can actually help prevent injuries by improving joint stability. However, it’s important to use proper form and not overdo these sessions, as excessive low-cadence training can lead to knee strain if performed incorrectly — road cycling.

Cadence Ladders: Progressive Training for Adaptation

Cadence ladder training combines intervals that transition from low to high RPM, helping your body adapt to varied demands during different riding conditions. Start with a 10-minute warm-up at your natural cadence, then perform intervals that progress from 60 RPM to 110 RPM over 5 minutes, holding each cadence for 1 minute before increasing. This progressive approach teaches your neuromuscular system to handle rapid cadence changes while maintaining power output. The ladder format also improves your ability to shift gears smoothly and efficiently during real-world riding scenarios. Include these sessions once weekly to develop versatility in your pedaling technique and prepare for race situations where cadence requirements change frequently.

Cadence ladders are particularly effective because they mimic the natural cadence variations that occur during real rides. You’ll experience the need to accelerate out of corners, maintain steady effort on flats, and power up climbs – all within a single training session. This variety not only improves your physical capabilities but also enhances your mental awareness of cadence and its relationship to effort level. Over time, you’ll develop an intuitive sense of the most efficient cadence for different situations, allowing you to conserve energy and perform better during long rides or competitive events.

Improving Pedal Efficiency Through Technique

The ‘Scrape’ Technique: Reducing Dead Spots at Bottom Stroke

The scraping technique addresses the most common inefficiency in pedal strokes: the dead spot at the bottom of the revolution. Focus on ‘scraping mud’ off your shoe at the bottom of the stroke, specifically in the 6-8 o’clock position. This mental cue helps you maintain tension on the pedals throughout the entire revolution rather than allowing a brief relaxation period. By actively scraping through this phase, you eliminate the power loss that occurs when your foot simply hangs at the bottom of the stroke.

This technique also promotes a smoother, more circular pedal motion that reduces stress on your knees and improves overall efficiency. Many cyclists unknowingly have significant power losses in the bottom and top quadrants of their pedal stroke. The scraping motion helps maintain continuous power application throughout the entire revolution. To practice this technique, try riding with one leg at a time on a trainer – you’ll immediately feel where your stroke has weaknesses. Once you’ve developed the scraping motion, integrate it into your regular riding, especially during high-intensity efforts where efficiency becomes crucial for performance.

360° Power: Active Pulling Up on Pedals

  • Actively pull up on the pedals during the 8-12 o’clock position rather than just pushing down

  • Imagine scraping your foot backward and then pulling it up through the top of the stroke

  • Maintain consistent tension on the pedals throughout the entire 360-degree revolution

  • Practice single-leg drills to feel the difference between pushing only versus complete pedal strokes

  • Use a cadence sensor to monitor your efficiency – smoother strokes often result in more consistent RPM

The complete pedal stroke involves more than just pushing down – it requires active engagement throughout the entire 360-degree revolution. Many cyclists focus only on the downstroke, missing out on significant power potential from the upstroke and transition phases. By actively pulling up on the pedals during the recovery phase, you create a more balanced power output and reduce the stress on your quadriceps during long rides. This technique also helps maintain momentum and reduces the energy wasted in starting each new pedal stroke from a dead stop.

Professional cyclists spend considerable time developing this complete pedal technique because it translates directly to better performance. The upstroke becomes particularly important during climbing, where every watt of power matters, and during time trials, where efficiency over long durations determines success. To develop this skill, practice riding with a slightly higher cadence than normal while focusing on maintaining tension on the pedals throughout the entire revolution. You should feel a smooth, circular motion rather than a choppy, up-and-down movement.

Isolated Leg Training for Balance and Smoothness

Isolated leg training reveals and corrects imbalances between your left and right legs while improving overall pedal stroke smoothness. On a trainer, unclip one foot and pedal with only one leg for 30-60 second intervals. This drill highlights weaknesses in your pedal technique, such as dead spots, inconsistent power application, or balance issues. You’ll quickly notice if one leg is significantly stronger or if you have trouble maintaining smooth circles with a single leg.

Perform 3-5 sets per leg, alternating between legs with 30-second rest periods. Over time, this training develops better neuromuscular coordination and creates a more balanced, efficient pedal stroke that translates to improved performance when both legs are engaged. Many cyclists are surprised to discover they have a dominant leg that does significantly more work than the other. Addressing these imbalances not only improves power output but also reduces the risk of overuse injuries that can develop from compensating for weak sides. Include isolated leg training in your routine once or twice weekly, especially during base training periods when you’re focusing on technique development.

The most surprising finding in cadence training research is that there’s no single “optimal” cadence that works for everyone. What matters most is your ability to maintain smooth, efficient pedal strokes across different RPM ranges. Elite cyclists succeed not because they ride at exactly 95 RPM, but because they’ve trained their bodies to be efficient at various cadences and can adapt to different riding conditions. The key action step is to start incorporating cadence-specific drills into your training routine immediately. Begin with just one high-cadence and one low-cadence session per week, focusing on technique rather than speed or power. Track your progress with a cadence sensor and watch as your efficiency and endurance improve over time.