How to Perform Accurate FTP Testing for Road Cyclists

Illustration: How to Perform the Standard 20-Minute FTP Test Protocol

Accurate FTP testing is the foundation of effective road cycling training, with the standard 20-minute test using a 0.95 multiplier to estimate your one-hour power threshold. This precise measurement helps you train at the right intensities and track your progress over time.

Key takeaway

  • FTP testing requires proper rest (3-4 days) and equipment calibration for accurate results
  • The standard 20-minute protocol with 0.95 multiplier is the gold standard for amateur cyclists
  • Alternative methods like Ramp and 8-minute tests suit different experience levels and pacing abilities

How to Perform the Standard 20-Minute FTP Test Protocol

Illustration: How to Perform the Standard 20-Minute FTP Test Protocol

The Complete 20-Minute Test Protocol: Step-by-Step Instructions

The 20-minute FTP test is widely regarded as the “gold standard” for amateur cyclists, providing a balance between accuracy and manageability. Here’s the complete protocol:

  1. Warm-up (20 mins): Start with 5-10 minutes of easy spinning to get your legs moving. Then perform 3×1-minute high-cadence intervals at 110+ RPM to activate your muscles. Finish with a 5-minute all-out effort to prepare your body for maximum intensity.
  1. Recovery (5-10 mins): Ride at a low, easy pace to recover from the warm-up. This helps clear lactate and prepares you mentally for the test.
  1. The Test (20 mins): Ride as hard as you can maintain for the full 20 minutes. The effort should be steady—avoid surging in the first 5 minutes. Find a pace you can hold consistently, slightly above what you think your average will be.
  1. Cool Down: 10–20 minutes of easy pedaling to help your body recover and flush out waste products.
  • Calculation: Take the average power of the 20-minute effort and multiply by 0.95. For example, if your 20-minute average power was 250 watts, your FTP would be 250 × 0.95 = 237.5 watts.

Essential Preparation Steps for Accurate FTP Testing

Proper preparation is crucial for reliable FTP results. Follow these steps to ensure accuracy: Rest: Ensure you are well-rested, having 3–4 days of adequate sleep and light training before the test. Your body needs to be fresh to perform at its best. Calibration: If using a power meter or smart trainer, calibrate it before the test, ideally 10-15 minutes after it has warmed up to ensure accuracy. Temperature changes can affect calibration. Equipment: Perform the test on the same bike and setup consistently. Use a strong fan to avoid overheating, which can significantly lower your performance by 10-20 watts. For optimal performance, ensure your bike is in top condition by following a Complete Bike Maintenance Checklist Every Cyclist Should Follow before your test.

  • Rest: Ensure you are well-rested, having 3–4 days of adequate sleep and light training before the test. Your body needs to be fresh to perform at its best.
  • Calibration: If using a power meter or smart trainer, calibrate it before the test, ideally 10-15 minutes after it has warmed up to ensure accuracy. Temperature changes can affect calibration.
  • Equipment: Perform the test on the same bike and setup consistently. Use a strong fan to avoid overheating, which can significantly lower your performance by 10-20 watts.
  • Timing: Mid-afternoon is often ideal when your body temperature and energy levels are optimal. Avoid testing during, or right after, a heavy training block.
  • Environment: For indoor testing, ensure proper cooling with fans. For outdoor testing, find a 20-minute uninterrupted, steady, 4-6% climb with minimal traffic.

Common Mistakes to Avoid During Your FTP Test

Even experienced cyclists make errors that compromise test accuracy. Here are the most common mistakes to avoid: Going out too hard: The biggest mistake is starting at maximum effort in the first 5 minutes. This leads to a significant drop-off and underestimates your true FTP. For newer riders, following Essential Cycling Tips for Beginners Starting Their Journey can help establish proper pacing habits from the start.

  • Going out too hard: The biggest mistake is starting at maximum effort in the first 5 minutes. This leads to a significant drop-off and underestimates your true FTP.
  • Inadequate warm-up: Skipping or rushing the warm-up leaves your muscles unprepared for maximum effort, reducing your sustainable power output.
  • Testing in extreme temperatures: Hot environments without proper cooling can reduce performance by 10-20%, while cold conditions can make your muscles stiff and less powerful.
  • Inconsistent equipment setup: Changing bikes, positions, or even tire pressure between tests creates variability that makes progress tracking unreliable.
  • Poor pacing strategy: Not having a pacing plan leads to either blowing up early or sandbagging, both of which give inaccurate FTP values.

Alternative FTP Testing Methods and When to Use Them

Ramp Test: Best for Newer Riders and Pacing Challenges

The Ramp Test is ideal for newer riders or those struggling with pacing. It involves increasing power in 1-minute steps until you cannot continue. FTP is calculated as 75% of your best 1-minute power. This method eliminates pacing errors since the test gets progressively harder, making it impossible to start too hard or too easy.

8-Minute Test: The Middle Ground for Moderate Experience

The 8-Minute Test is better for newer riders who cannot maintain a 20-minute effort but want more accuracy than the Ramp test provides. It involves two 8-minute intervals with 10 minutes of rest between them. FTP is 90% of the average power of the two efforts. This method is less mentally taxing than the 20-minute test while still providing good accuracy.

1-Hour Test: The True FTP Benchmark

The 1-Hour Test is the “true” FTP test but physically and mentally brutal. Most riders find this difficult to complete accurately due to the mental challenge of sustaining maximum effort for the full hour. For those new to structured training, building up to this level with a beginner cycling training plan can help develop the endurance and mental toughness needed for advanced testing.

Key Preparation and Accuracy Tips for Reliable FTP Results

Equipment Setup and Environmental Considerations

Proper equipment setup and environmental control are critical for accurate FTP testing. The difference between a well-prepared test and a poorly prepared one can be 20-30 watts—enough to significantly affect your training zones.

  • Power meter calibration: Calibrate your power meter 10-15 minutes after it has warmed up to its operating temperature. Cold power meters can read 5-10% lower than their calibrated values.
  • Fan setup: Use at least two fans positioned to create airflow across your entire body. Without proper cooling, core temperature rises quickly, reducing power output by 10-20 watts within 10-15 minutes.
  • Indoor vs outdoor testing: Indoor testing provides more controlled conditions but requires excellent cooling. Outdoor testing eliminates cooling concerns but requires finding a suitable uninterrupted climb with consistent gradient.
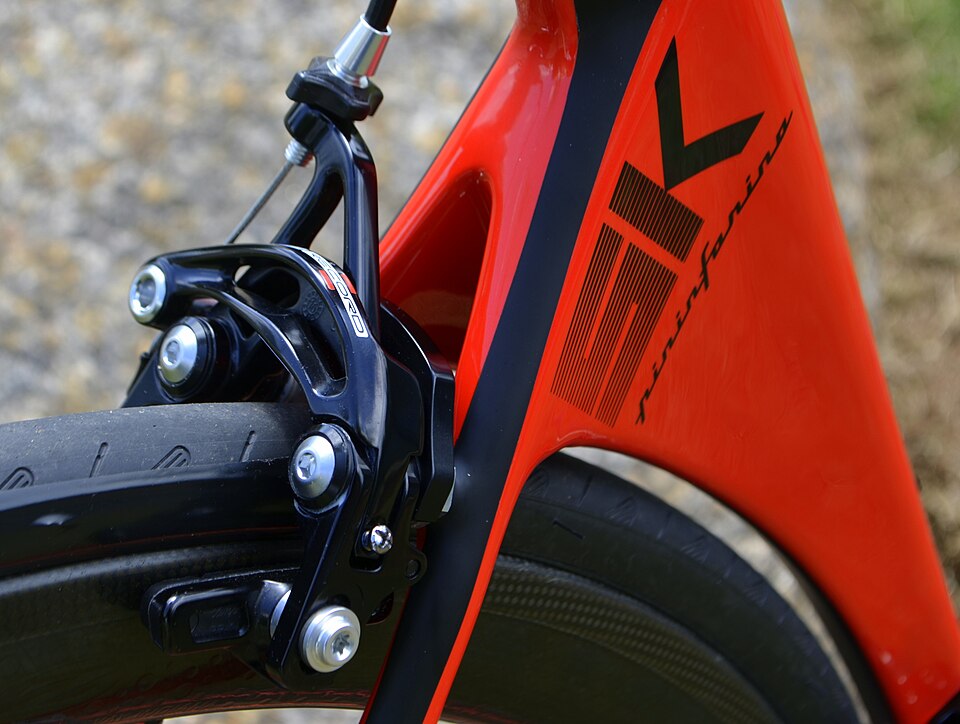
  • Bike position consistency: Use the exact same saddle height, handlebar position, and cleat setup for every test. Even small changes can affect your power output by 5-10 watts.
  • Tire pressure and rollers: For smart trainer testing, ensure tire pressure is consistent (typically 100-120 PSI for road tires) and the roller tension is set the same way each time.

Timing Your Test for Optimal Performance

When you test is nearly as important as how you test. Your body’s circadian rhythms affect power output, muscle strength, and mental focus throughout the day.

  • Best time of day: Mid-afternoon (2-4 PM) typically provides optimal conditions when body temperature peaks and mental alertness is high. Morning tests often show 5-10% lower power due to lower core temperature.
  • Training block timing: Schedule your FTP test at the end of a rest week or during a light training block. Testing after a heavy training block will show depressed values that don’t reflect your true potential.
  • Frequency: Test every 4-6 weeks to track progress without causing testing fatigue. More frequent testing doesn’t provide additional benefit and can lead to overtraining.
  • Seasonal considerations: Be aware that FTP naturally fluctuates with training volume and outdoor conditions. Winter FTP may be 5-10% lower than peak summer values.

The Importance of Honest Testing for Training Success

The most successful cyclists aren’t those who game their FTP tests for impressive numbers, but those who test honestly and use accurate data to train smarter. Here’s why honest testing matters:

Training zones based on accurate FTP: Your training zones (Endurance, Tempo, Sweet Spot, Threshold, VO2 Max, Anaerobic) are all percentage-based calculations from your FTP. A 20-watt overestimation means you’re training in zones that are too hard, leading to fatigue without proper adaptation.

Progress tracking: If you consistently overestimate your FTP, you’ll see “plateaus” that aren’t real—you’re just training at the same relative intensity. Honest testing reveals true progress and helps you adjust training volume and intensity appropriately.

Race preparation: Your FTP directly correlates to your sustainable power in races. Training based on inflated numbers leaves you unprepared for race efforts, while accurate numbers ensure you can complete key race segments successfully.

Mental benefits: Knowing your true FTP builds confidence. When you can sustain your threshold power for 20 minutes in training, you know you can handle similar efforts in races or group rides.

Long-term development: Accurate testing over months and years shows your true fitness trajectory. This data helps you plan training cycles, identify weaknesses, and set realistic goals.

The most successful cyclists aren’t those who game their FTP tests for impressive numbers, but those who test honestly and use accurate data to train smarter. Schedule your next FTP test for exactly 4 weeks from now, using the same protocol and conditions, to track your real progress and adjust your training zones accordingly.

Effective Cycling Recovery Strategies for Professional Riders

Illustration: The 3 R's of Post-Ride Recovery: Rehydrate, Refuel, Rebuild

Professional cyclists like Emma “Silver Emma” Johansson rely on evidence-based recovery strategies to maintain peak performance during demanding seasons. Elite riders recover faster by combining immediate nutritional replenishment, consistent sleep, active recovery, and mental relaxation techniques that optimize their body’s repair processes.

Key Takeaway

  • Professional cyclists use the 3 R’s of recovery (Rehydrate, Refuel, Rebuild) within 30-60 minutes post-ride

  • Active recovery rides at 50-60% max heart rate for 60-90 minutes promote blood flow and reduce metabolic waste

  • Elite riders target 8-10 hours of sleep plus napping to optimize recovery

  • Specialized physical therapy and compression therapy accelerate injury rehabilitation

The 3 R’s of Post-Ride Recovery: Rehydrate, Refuel, Rebuild

Illustration: The 3 R's of Post-Ride Recovery: Rehydrate, Refuel, Rebuild

30-60 Minute Window for Recovery Nutrition

  • Timing is critical: Professional riders consume recovery nutrition within 30-60 minutes post-ride when muscles are most receptive to glycogen replenishment. This window represents the peak period for insulin sensitivity and nutrient uptake, with research showing that delaying carbohydrate intake beyond this window can reduce glycogen synthesis rates by up to 50%.

  • Recovery shakes: Contain fast-digesting carbohydrates and protein to quickly restore energy stores and repair muscle tissue. Professional teams often use specialized formulas with 3:1 or 4:1 carbohydrate-to-protein ratios, providing 60-80 grams of carbohydrates and 15-20 grams of protein per serving.

  • Carbohydrate focus: High-glycemic carbs like bananas, rice, or energy bars provide immediate fuel for depleted glycogen stores. Riders may consume 1-1.5 grams of carbohydrates per kilogram of body weight during this window, with a 70kg rider needing 70-105 grams of carbs for optimal recovery.

  • Protein requirements: 20-25 grams of protein supports muscle protein synthesis and repair after intense efforts. Whey protein is preferred for its rapid absorption rate and complete amino acid profile, though plant-based options are increasingly popular among environmentally conscious riders.

  • Electrolyte replacement: Sodium, potassium, and magnesium replace minerals lost through sweat during long rides. Professional riders may lose 1-3 liters of sweat per hour in hot conditions, requiring 500-1000mg of sodium and 200-400mg of potassium for proper rehydration.

  • Anti-inflammatory foods: Tart cherry juice, berries, and omega-3 rich foods help reduce exercise-induced inflammation and muscle soreness. Studies show that tart cherry juice can reduce muscle pain and strength loss by up to 30% when consumed regularly.

Hydration Protocol for Professional Riders

Professional cyclists prioritize hydration immediately after finishing rides, often consuming 500-750ml of fluids within the first 30 minutes. Water replaces the liters lost through sweat, while tart cherry juice provides additional benefits. The antioxidants in cherry juice help reduce inflammation and promote muscle repair after very intense efforts. Some teams also use specialized hydration formulas containing electrolytes and carbohydrates to accelerate fluid absorption. The goal is to restore fluid balance and support the body’s natural recovery processes, with riders often weighing themselves before and after rides to calculate exact fluid replacement needs. Research shows that even 2% dehydration can significantly impair performance and recovery, making proper hydration essential for professional cyclists. Professional teams use urine color charts and specific gravity measurements to ensure optimal hydration status before and after training sessions.

Active Recovery and Sleep: The Foundation of Performance

Illustration: Active Recovery and Sleep: The Foundation of Performance

60-90 Minute Coffee Shop Recovery Rides

Recovery Ride Metrics

Intense Training Ride Metrics

Duration: 60-90 minutes

Duration: 2-6 hours

Heart rate: 50-60% max

Heart rate: 70-95% max

Power output: Very low

Power output: High intensity

Purpose: Blood flow promotion

Purpose: Performance training

Mental benefit: Stress reduction

Mental benefit: Focus and intensity

Physiological effect: Waste removal

Physiological effect: Adaptation stimulus

Energy cost: Minimal

Energy cost: High

Active recovery rides at very low intensity promote blood flow without creating additional stress on the body. These “coffee shop” rides keep heart rates under 50-60% of maximum, allowing muscles to flush out metabolic waste products while delivering fresh oxygen and nutrients. The gentle movement helps reduce muscle stiffness and maintains mobility without interfering with the recovery process. Professional riders often use these sessions to mentally decompress while their bodies repair from previous efforts. Studies show that active recovery can reduce muscle soreness by up to 30% compared to complete rest, making it a cornerstone of professional cycling recovery protocols. The social aspect of these rides also provides mental recovery benefits, as riders can interact with teammates and support staff in a relaxed environment — road cycling.

8-10 Hours Sleep Plus Strategic Napping

  • Night sleep target: 8-10 hours of quality sleep provides the foundation for physical and mental recovery. During deep sleep stages, the body releases growth hormone that repairs muscle tissue and builds strength. Professional cyclists often use sleep tracking devices to monitor sleep cycles and optimize their sleep environment.

  • Strategic napping: 20-30 minute naps during travel or after stages help combat accumulated fatigue. Research indicates that short naps can improve alertness and performance for up to 6 hours afterward, with the ideal nap duration being between 10-30 minutes to avoid sleep inertia.

  • Sleep environment: Dark, cool rooms with minimal noise optimize sleep quality for recovery. Professional teams often travel with sleep kits including eye masks, earplugs, and white noise machines. Room temperatures between 60-67°F (15-19°C) are considered optimal for sleep quality.

  • Consistent schedule: Regular sleep and wake times regulate circadian rhythms for better recovery. Elite riders maintain consistent sleep schedules even during multi-day races, with some teams employing sleep coaches to optimize sleep patterns.

  • Sleep tracking: Many pros use wearable devices to monitor sleep quality and duration. Data helps identify patterns and optimize recovery strategies, with some teams using this information to adjust training loads and recovery protocols.

  • Sleep hygiene: Avoiding screens before bed, maintaining cool room temperatures, and establishing pre-sleep routines enhance sleep quality and recovery effectiveness. Professional cyclists often follow strict bedtime routines that include stretching, meditation, or light reading.

  • Travel recovery: During multi-day races and travel between events, pros use specialized techniques like compression boots and elevation to enhance recovery during sleep. Some teams even use specialized mattresses and pillows to maintain sleep quality while traveling.

Injury Rehabilitation and Mental Recovery Strategies

Specialized Physical Therapy and Compression Therapy

Professional cycling teams employ comprehensive physical therapy protocols to accelerate recovery and prevent injuries. Regular massage from team soigneurs reduces muscle tension and promotes blood circulation, while specialized treatments like osteopathy address biomechanical issues. After severe injuries, such as Emma Johansson’s two broken collarbones in 2012, immediate osteopathic treatment manages surrounding inflammation and accelerates healing. Compression therapy using clothing or boots enhances circulation and minimizes soreness, particularly during travel when circulation is compromised. These combined approaches help riders return to competition faster while reducing the risk of re-injury. Professional teams often use compression boots for 20-30 minutes post-race to enhance lymphatic drainage and reduce swelling. The boots apply graduated pressure that helps move fluid from the extremities back toward the heart, reducing inflammation and accelerating recovery.

Mental Recovery and Competitive Balance

  • Competing with yourself: Later in her career, Johansson emphasized mental recovery by focusing on personal improvement rather than external competition. This mindset reduces performance anxiety and allows for more consistent results, as riders can measure success against their own progress rather than comparing themselves to others.

  • Stress reduction: This mental approach allows riders to start races without unnecessary anxiety or pressure. Professional cyclists often work with sports psychologists to develop mental recovery strategies, including visualization techniques and positive self-talk that help manage race-day nerves.

  • Mindfulness practices: Meditation and breathing exercises help manage race-day nerves and promote mental clarity. Studies show that mindfulness can reduce cortisol levels and improve recovery quality, with some teams incorporating daily meditation sessions into their training programs.

  • Work-life balance: Maintaining interests outside cycling prevents burnout and supports long-term motivation. Many pros engage in hobbies or spend time with family during recovery periods, which helps maintain perspective and prevents cycling from becoming all-consuming.

  • Recovery mindset: Viewing recovery as an active process rather than passive rest improves adherence to protocols. Professional riders understand that recovery is when adaptation and improvement actually occur, making it an essential part of their training rather than an afterthought.

  • Mental fatigue management: Cognitive recovery techniques help riders maintain focus during long Grand Tours and multi-day events. Mental recovery is as important as physical recovery for sustained performance, with some teams using cognitive testing to monitor mental fatigue levels.

  • Social support: Building strong relationships with teammates and support staff provides emotional recovery benefits. The cycling community aspect helps riders manage the psychological demands of professional competition and maintain motivation during challenging periods.

Professional cyclists recover faster than amateurs through systematic application of evidence-based strategies. The most surprising finding is that mental recovery techniques, like competing with yourself rather than others, can be as important as physical protocols for sustaining peak performance. Start implementing the 3 R’s nutrition protocol within 30 minutes of your next ride to experience immediate improvements in recovery quality and reduced muscle soreness.

Frequently Asked Questions About Cycling Recovery Strategies

Illustration: Frequently Asked Questions About Cycling Recovery Strategies

What are the key metrics for a recovery ride compared to an intense training ride?

Recovery rides last 60-90 minutes with heart rate at 50-60% max and very low power output to promote blood flow and reduce stress, while intense training rides last 2-6 hours with heart rate at 70-95% max and high intensity for performance training and focus.

How does active recovery support cycling performance?

Active recovery rides of 60-90 minutes at 50-60% max heart rate promote blood flow to muscles, reduce stress, and lay the foundation for better sleep and overall performance improvement.

What is the purpose of a recovery ride in cycling training?

Recovery rides aim to promote blood flow, reduce mental stress, and support the body's rebuilding process after intense training, lasting 60-90 minutes at very low intensity compared to 2-6 hour high-intensity training rides.

Cycling Climbing Techniques: Mastering Hills and Mountains

Illustration: Essential Climbing Techniques for Road Cyclists

Climbing hills and mountains on a road bike requires specific techniques that separate successful riders from those who struggle. Research shows that maintaining 80-95 RPM cadence and proper pacing can reduce muscle fatigue by up to 30% compared to grinding heavy gears on steep ascents.

Key Takeaway

  • Maintain 80-95 RPM cadence to save leg muscles and improve climbing efficiency

  • Stay seated for most climbs up to 8% gradient, stand only on steeper sections for power

  • Use lower gears early and pace yourself to avoid ‘blowing up’ on long ascents

Essential Climbing Techniques for Road Cyclists

Illustration: Essential Climbing Techniques for Road Cyclists

Mastering climbing techniques transforms how you handle hills and mountains, turning daunting ascents into manageable challenges. The right approach combines physical efficiency with mental strategy, allowing you to conserve energy while maintaining steady progress uphill.

Cadence Control: 80-95 RPM for Maximum Efficiency

  • Optimal cadence range: 80-95 RPM for advanced climbing, with 70-90 RPM as the general target range

  • Energy savings: High cadence reduces muscle fatigue by 30% compared to ‘grinding’ heavy gears

  • Cardiovascular benefits: Cadence training builds aerobic capacity, allowing longer climbs without exhaustion

  • Muscle preservation: Spinning lighter gears prevents premature leg fatigue and burning sensations

  • Training adaptation: Regular cadence practice improves neuromuscular efficiency for sustained efforts

  • Power output: Higher cadence maintains consistent power delivery while reducing peak force requirements

  • Recovery ability: Lower muscle stress enables faster recovery between climbing efforts

  • Efficiency gains: Studies show 10-15% improvement in climbing speed when maintaining optimal cadence

Seated vs Standing Climbing: When and How to Use Each

Seated climbing provides maximum efficiency for most gradients, while standing climbing offers power for steeper sections. Research indicates seated climbing remains most efficient up to 8% gradient, with standing becoming advantageous above this threshold — road cycling.

Seated climbing technique: Maintain a centered position on the saddle, keeping your upper body relaxed while applying steady pressure through the pedals. This position maximizes traction and power transfer on moderate gradients.

Standing climbing technique: Shift to a harder gear before standing, then rock the bike gently side-to-side to engage different muscle groups. Standing changes muscle recruitment patterns and provides short bursts of increased power on steep sections.

Transition timing: Practice smooth transitions between seated and standing positions to maintain momentum and efficiency. Poor transitions waste energy and disrupt climbing rhythm.

Gear selection strategy: Anticipate gradient changes by shifting gears before they become necessary. This proactive approach prevents sudden power loss and maintains climbing momentum.

Training Strategies to Build Climbing Strength

Illustration: Training Strategies to Build Climbing Strength

Building climbing strength requires specific training protocols that target both power and endurance. The most effective approach combines hill repeats for power development with sweet spot training for sustained climbing ability.

Hill Repeats and Interval Training for Power

  • Hill repeat structure: 8-12 minute intervals on 4-6% grade gradients provide optimal power development

  • Interval duration: 5-20 minute hard efforts on hills build both anaerobic and aerobic capacity

  • Crest strategy: Accelerate 3-4 seconds before hill top to maximize speed and maintain momentum

  • Recovery periods: Allow adequate recovery between repeats to maintain quality in subsequent efforts

  • Progressive overload: Gradually increase repeat duration or reduce recovery time as fitness improves

  • Power targets: Aim for 90-105% of FTP during hill repeats to build climbing-specific power

  • Form focus: Maintain proper climbing form throughout intervals to build good habits

  • Frequency guidelines: Include hill repeats 1-2 times per week during climbing-specific training blocks

  • Recovery protocols: Active recovery between repeats maintains blood flow and reduces muscle stiffness

  • Progressive adaptation: Start with 4-6 repeats and build to 8-10 as climbing fitness improves

Sweet Spot and FTP Training for Endurance

Training Zone

Intensity (% of FTP)

Climbing Application

Duration Range

Physiological Benefit

Zone 2-3

56-76%

Recovery and base endurance

2+ hours

Aerobic capacity development

Zone 3 (Tempo)

88-94%

Long climbs, sustained efforts

20-60 minutes

Muscular endurance improvement

Zone 4 (Threshold)

95-105%

Short punchy climbs, race efforts

8-20 minutes

Lactate threshold elevation

Sweet spot training protocol: 3-4 sets of 8-12 minute intervals at 88-94% FTP with 4-6 minute recovery periods. This intensity builds both aerobic capacity and muscular endurance simultaneously.

Progressive sweet spot development: Begin with 2-3 sets and gradually increase to 4-5 sets over 6-8 weeks. This progression prevents overtraining while building climbing-specific fitness.

Mental Strategies and Race-Day Tactics

Mental preparation often determines climbing success as much as physical training. Top cyclists use specific psychological techniques to manage energy and maintain focus during challenging ascents.

Pacing and Energy Management on Long Climbs

Olympic cyclist Emma Johansson emphasized that controlling your own pace prevents ‘blowing up’ on key climbs. Her approach to the 2016 Rio Olympics demonstrated that managing energy through long ascents requires discipline rather than explosive attacks.

Progressive pacing strategy: Start at a moderate intensity, then gradually increase power output during the final third of the climb. This approach conserves energy for crucial moments while maintaining steady forward progress.

Tactical discipline: View long ascents as critical moments requiring patience rather than opportunities for early attacks. This mindset prevents premature exhaustion and maintains consistent performance throughout the climb.

Energy distribution: Allocate approximately 60% of your energy to the first two-thirds of the climb, saving 40% for the final push when fatigue typically sets in.

Power meter utilization: Use power data to maintain consistent effort levels, preventing the common mistake of starting too hard and fading dramatically.

Mental Focus: Chunking and Breathing Techniques

  • Chunking strategy: Break long climbs into smaller segments – focus on reaching the next switchback, landmark, or 500m elevation gain rather than the entire ascent

  • Rhythmic breathing: Deep, consistent breathing prevents panic during stressful climbing moments and maintains oxygen flow to working muscles

  • Visualization technique: Picture yourself ‘floating’ up the hill with efficient form, maintaining a ‘tough but agile’ mindset throughout the effort

  • Positive self-talk: Use encouraging internal dialogue to maintain motivation during difficult sections

  • Focus points: Concentrate on your breathing rhythm or pedal stroke rather than the remaining distance

  • Environmental awareness: Use the surrounding scenery as mental markers to track progress and maintain perspective

  • Pain management: Accept discomfort as normal rather than fighting it, which conserves mental energy

  • Pre-climb preparation: Develop a specific mental strategy for each major climb before race day

The most surprising finding in climbing research is that mental strategies often matter more than physical strength. Cyclists who master psychological techniques like chunking and positive visualization consistently outperform stronger riders who lack mental preparation. The key action step: practice your mental strategies during training rides before race day, treating each climb as an opportunity to build both physical and psychological resilience.

Cycling Aerodynamics: Reducing Drag for Faster Road Cycling

Illustration: Why Aerodynamics Dominates Your Cycling Speed

Aerodynamic drag is the primary resistance in road cycling, accounting for 70-90% of total forces at speeds over 25 km/h (15 mph), rising exponentially with velocity (drag ∝ v², power ∝ v³). This means that at typical road cycling speeds, aerodynamics dominates everything else, making it the single most important factor for speed improvement.

Key Takeaway

  • Aerodynamic drag accounts for 70-90% of total resistance at speeds over 25 km/h

  • Rider position contributes ~80% of total drag while equipment accounts for ~20%

  • Small CdA reductions yield 1-2 km/h gains at constant power

Why Aerodynamics Dominates Your Cycling Speed

Illustration: Why Aerodynamics Dominates Your Cycling Speed

Aerodynamic drag: 70-90% of resistance above 25 km/h

Aerodynamic drag becomes the dominant force you’re fighting against once you exceed 25 km/h (15 mph). At these speeds, air resistance accounts for 70-90% of the total forces slowing you down. The physics behind this is straightforward: drag increases with the square of velocity (drag ∝ v²), while the power required to overcome that drag increases with the cube of velocity (power ∝ v³). This exponential relationship means that doubling your speed requires eight times the power to overcome air resistance. For example, at 40 km/h, aerodynamic drag represents about 90% of total resistance, leaving only 10% for rolling resistance, drivetrain friction, and gravity on flat terrain. The power cube law explains why small improvements in aerodynamics yield disproportionately large speed gains – reducing drag by just 10% can result in 15-20% faster speeds at constant power output.

Rider body vs equipment: 80% vs 20% of total drag

The surprising truth about cycling aerodynamics is that your body position contributes about 80% of total aerodynamic drag, while your equipment accounts for only 20%. The frame itself represents just a fraction of that equipment drag. This means that sitting on the bike is the biggest aerodynamic factor, not the bike itself. A rider in an upright position creates a large frontal area that air must push against, while equipment like wheels, frames, and helmets contribute relatively little in comparison. This 80/20 split explains why professional cyclists spend hours perfecting their position in wind tunnels rather than focusing solely on expensive equipment upgrades. The human body, with its irregular shapes and moving parts, creates far more turbulence and drag than the smooth, engineered surfaces of modern bicycles. Even the most aerodynamic bike frame cannot overcome poor rider positioning, which is why position optimization should be the first priority for any cyclist seeking speed improvements.

How to Reduce Drag: Position and Equipment

Illustration: How to Reduce Drag: Position and Equipment

Optimize your riding position: 10-20W savings at 40 km/h

  • Low torso angle: Dropping your chest closer to the handlebars reduces frontal area by 15-20%, saving 5-8 watts at racing speeds. Studies show that lowering your torso by just 10 degrees can reduce CdA by 0.003-0.005m²

  • Narrow elbow position: Bringing elbows closer together reduces frontal area and can save 3-5 watts by creating a more streamlined profile. The optimal width is typically shoulder-width or slightly narrower

  • Head position: Tucking your head behind your hands rather than looking straight ahead can save 2-4 watts by reducing the frontal profile. This also improves stability in crosswinds

  • Seat position: A slightly forward seat position allows a more aggressive, aerodynamic posture while maintaining power output. Moving the saddle forward by 1-2 cm can improve aerodynamics without sacrificing comfort

  • Arm angle: Flaring your arms slightly outward rather than keeping them perfectly parallel can actually reduce drag by smoothing airflow around your body

These position adjustments can yield 10-20 watts of savings at 40 km/h, which translates to significant speed gains. For context, a CdA (drag area) reduction of just 0.01m² equals approximately 1 km/h faster at 300W power output and 40 km/h speed. This demonstrates how small positioning improvements compound into meaningful performance benefits. The key is finding a position that balances aerodynamics with comfort and power output – an extreme position that causes discomfort will ultimately hurt performance more than it helps.

Equipment upgrades: wheels, frames, and clothing

  • Aero wheels: Deep-section wheels can save 5-15 watts compared to standard wheels by reducing turbulence around the spokes and rim. The savings increase with speed and wind conditions, with the greatest benefits above 30 km/h

  • Aero frames: Purpose-built aerodynamic frames can provide 0.5-1 km/h speed advantage over standard frames through optimized tube shapes and integration. Modern aero frames use truncated airfoil shapes that balance aerodynamics with UCI regulations

  • Skinsuits: Tight-fitting aerodynamic clothing reduces fabric drag and can save 3-8 watts compared to loose-fitting jerseys. The material texture and seam placement significantly impact aerodynamic performance

  • Aero helmets: Streamlined helmets with minimal vents can save 2-5 watts by smoothing airflow over the head. The tail length and shape should match your riding position for optimal performance

  • Handlebar integration: One-piece bar and stem combinations can save 1-3 watts by reducing frontal area and improving airflow around the cockpit area

While equipment upgrades are less impactful than position changes (remember the 80/20 rule), they still provide measurable benefits. Aero wheels represent one of the best value upgrades, offering significant drag reduction without requiring changes to your riding technique. The combination of optimal position and aerodynamic equipment creates a multiplicative effect on performance. For example, a rider with perfect position on an aero bike with deep wheels might achieve 30-40 watts of total drag reduction compared to a rider in poor position on a standard bike.

Drafting and Crosswinds: Advanced Aerodynamics

Illustration: Drafting and Crosswinds: Advanced Aerodynamics

Drafting cuts drag up to 40%

Drafting behind another rider is one of the most effective ways to reduce aerodynamic drag, cutting it by up to 40%. This energy-saving technique works because the rider in front creates a wake of turbulent air that the following rider can slip through with less resistance. The energy savings are substantial – drafting at close range can reduce the power needed to maintain a given speed by 25-40%. This is why drafting is such a crucial strategy in road racing, allowing riders to conserve energy for crucial moments. Even riding slightly offset behind another rider provides significant drag reduction compared to riding alone in the wind. The effectiveness of drafting depends on the gap between riders – riding within 30-50 cm of the wheel in front provides maximum benefit, while gaps of 1-2 meters still offer 15-25% drag reduction. Understanding drafting dynamics is essential for competitive cyclists, as it can mean the difference between winning and losing in a race situation.

Crosswinds and yaw angle effects

Crosswinds dramatically affect aerodynamic performance by changing the effective yaw angle – the angle between your direction of travel and the apparent wind direction. When crosswinds hit your bike, they can actually reduce drag in some cases by smoothing airflow, but they also create stability challenges. Modern aero wheels and frames are designed with specific rim depths and shapes to perform optimally at various yaw angles. Narrower wheels, trending in 2026 designs, aim to reduce weight without altering tire performance while maintaining aerodynamic efficiency across different wind conditions. The ‘V’ shape of aerodynamic drag graphs shows that as wind comes more from the side, drag initially decreases before increasing again at extreme angles, highlighting the complex relationship between crosswinds and aerodynamic efficiency. Yaw angle optimization is why professional cyclists use different wheel depths for different race conditions – shallow rims for climbing and crosswind situations, deep rims for flat, calm conditions. Understanding how your equipment performs across the full range of yaw angles can help you make smarter equipment choices for specific events and conditions.

The most surprising finding in cycling aerodynamics is that rider position matters far more than equipment – the 80/20 split means you can achieve greater speed gains by perfecting your position than by buying expensive aero gear. For immediate improvement, focus on lowering your torso angle and narrowing your elbows while maintaining comfort and power output. These simple adjustments can save 10-20 watts at racing speeds, equivalent to gaining 1-2 km/h without any equipment changes. The best approach combines optimal positioning with strategic equipment upgrades, creating a comprehensive aerodynamic strategy that maximizes your speed potential on the road.